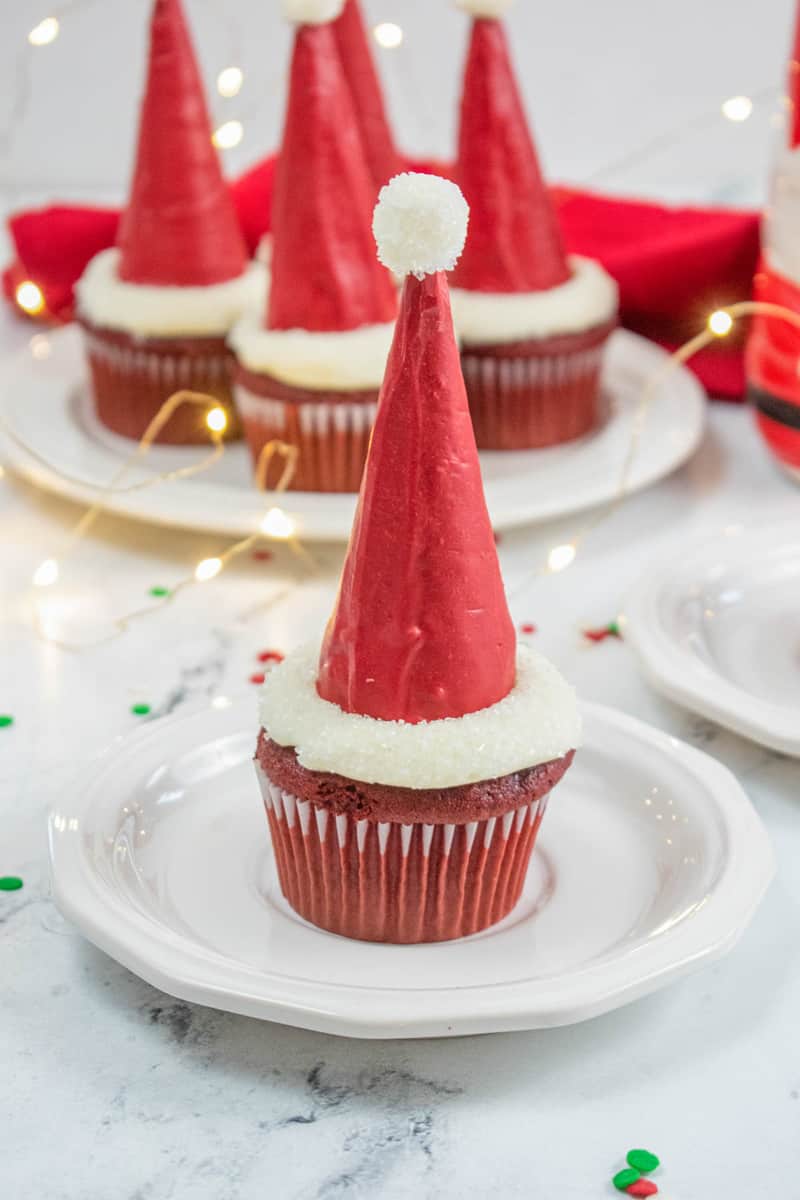
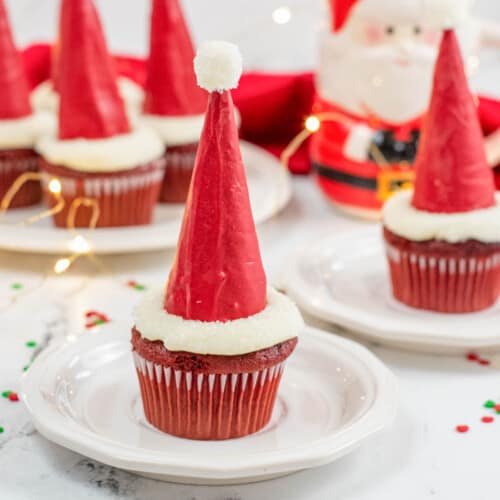
Santa Claus is coming to town. Celebrate the season with these super cute Santa Hat Cupcakes. They will be the gift the keeps on giving at your next holiday party!
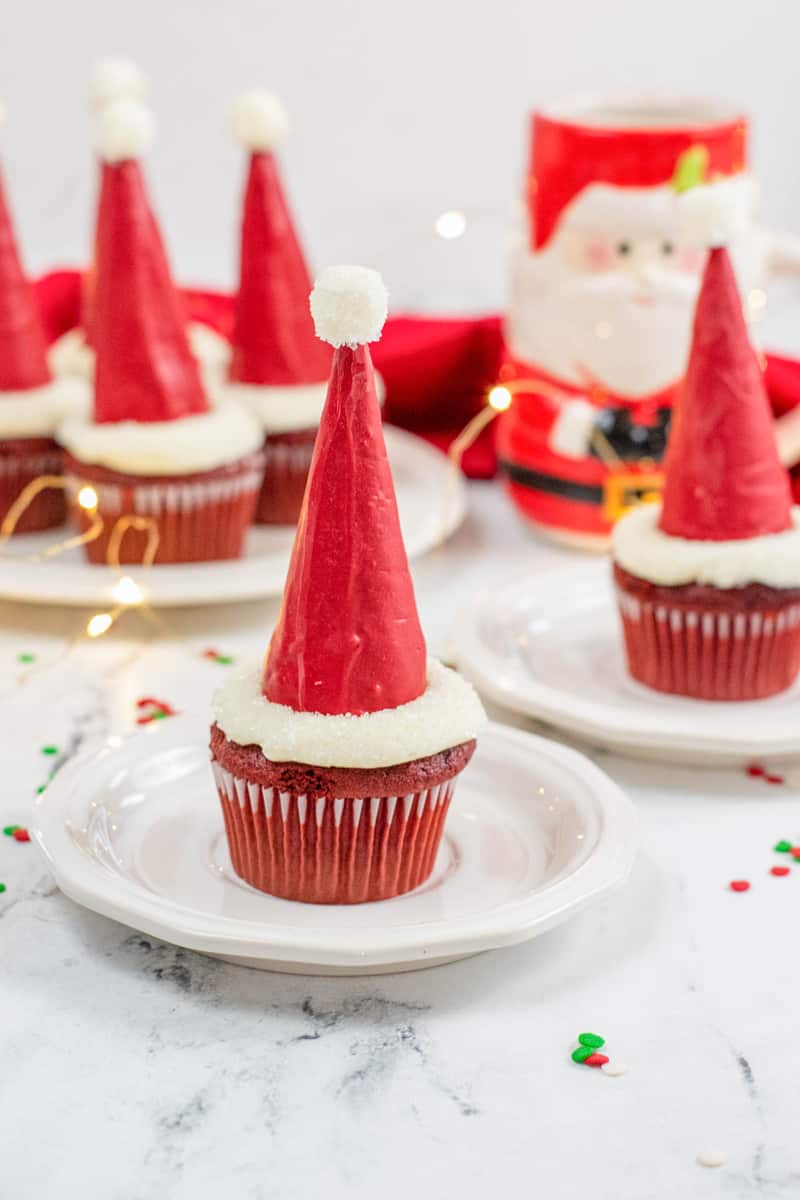
I love Christmas time of year! The movies, the carols, the decorations and especially the baking! Over the years I have gotten more and more adventurous in my baking. I used to just be the Christmas Cookie kind of mom with the occasion Holiday Popcorn or Muddy Buddies sprinkled in. This year I have been on a cupcake baking spree. I have loved trying and perfecting the different cupcakes I have posted, and these are probably my most adventurous yet! These Santa Hat Cupcakes are super cute and festive, and my kids loved them!
How to make Santa Hat Cupcakes:
This recipe does take some time to prepare. You do have to prepare your cupcakes ahead of time. Unfortunately, there are not many options to purchase premade cupcakes at the grocery store that do not have icing on them already. So I recommend making some Red Velvet cupcakes or using my Vanilla Cupcake recipe. You can dye the vanilla cupcake batter red if you are not going to make red Velvet Cupcakes.
Once you have your cupcakes made and cooled then it is time to top them with the Santa Hats. Follow the directions below to make these!
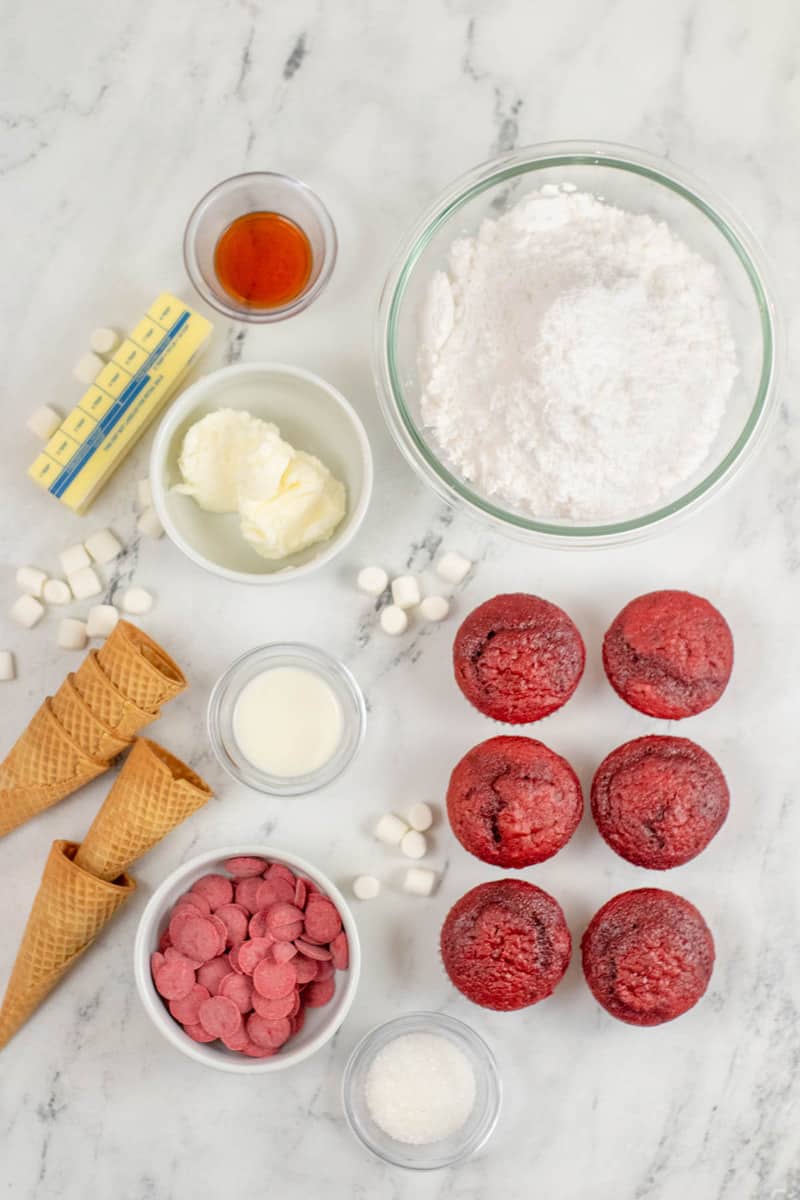
Ingredients:
- Red Velvet Cupcakes (cooled completely)
- Salted Butter (softened)
- Shortening
- Powdered Sugar
- Vanilla Extract
- Milk
- Mini Marshmallows
- Sugar Cones
- Red Candy Melts
- Sanding Sugar or White Sprinkles
Directions:
- Tip: The frosting should be soft but still hold up. If necessary add up to one more cup of powdered sugar to make it the right texture.
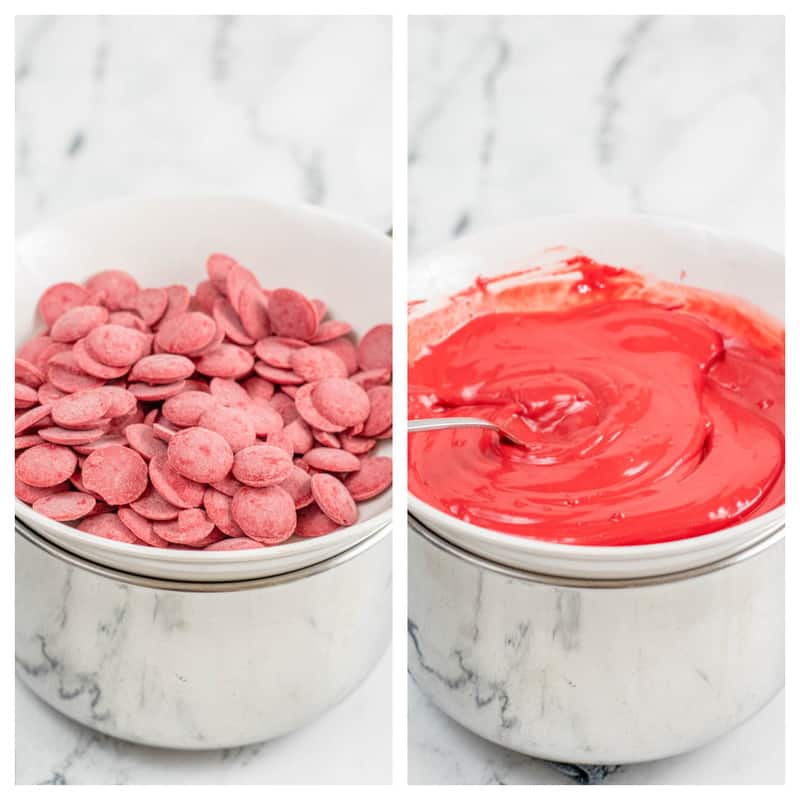
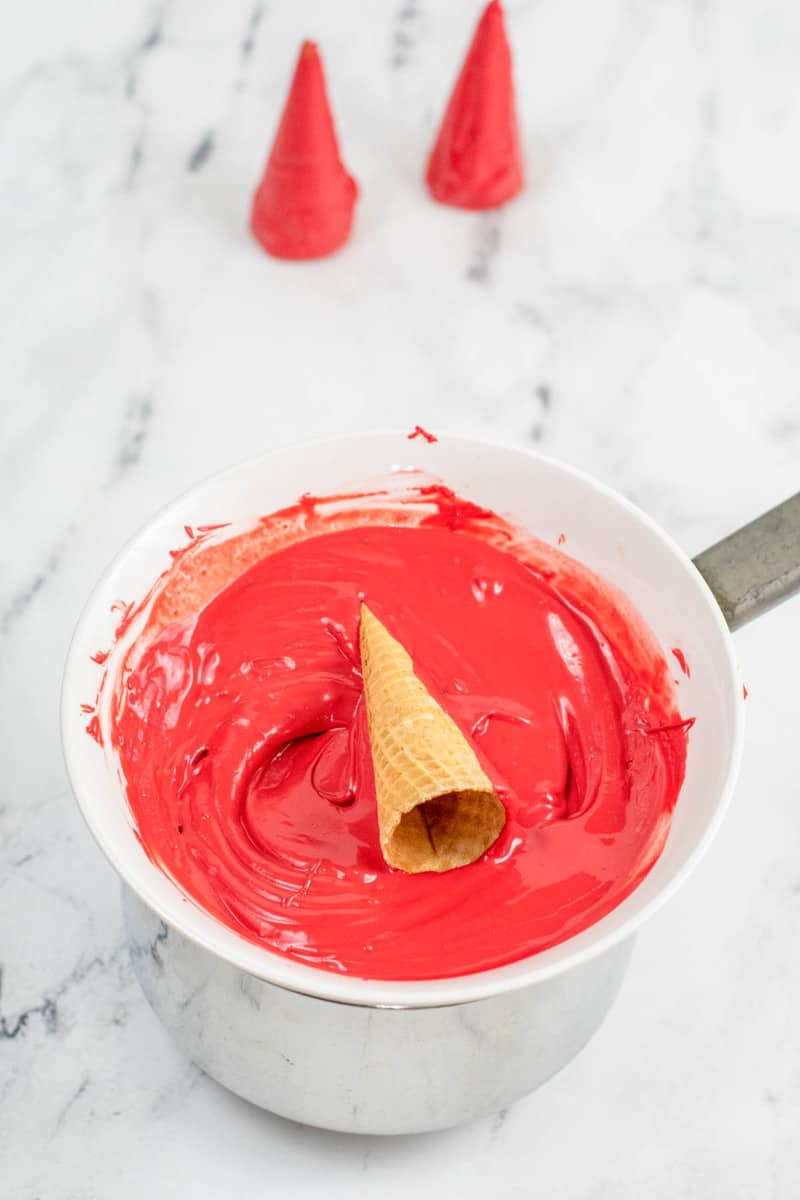
Step Four - In the bowl of a double boiler (or a heat safe bowl over a pot of water) melt the red candy melts over medium heat. If necessary to create a smooth texture add 1- 2 tbsp of shortening.
- Tip: Can substitute coconut oil instead of shortening if you wish.
Step Five - Set both finished frostings aside.
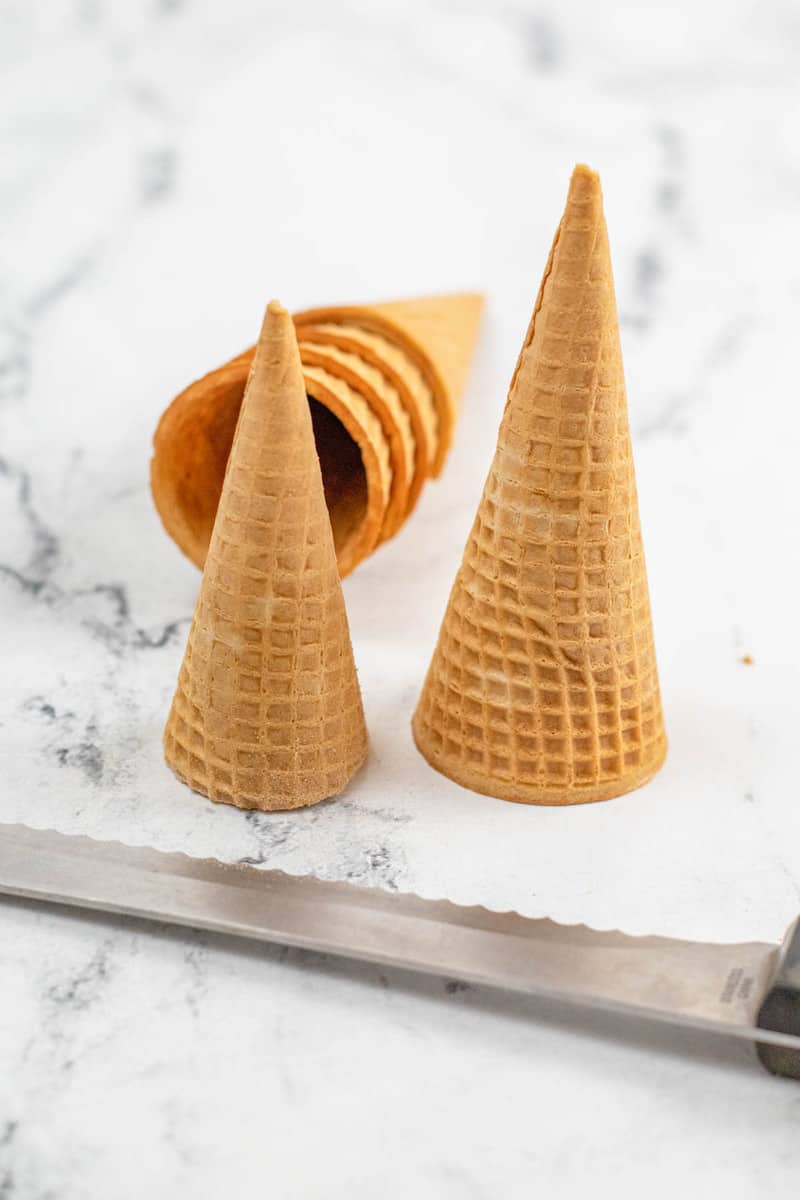
- Tip: It works best to score all the way around and then snap off the cone.
When to assemble this cupcake?
Due to the tall nature of the Santa Hats it is best to assemble these when you are ready to serve them. You can go ahead and make everything ahead of time, including getting your Santa Hats ready and made. Once it is time to serve them, frost the cupcakes and then add your hat to the top.
How should I store these cupcakes?
If you happen to have any left over, this is your best way to store them. Get a gallon sized zip lock bag, and carefully place them standing up in the bag. The store on the counter somewhere they won't get knocked over. These are best if eaten within 3-5 days of making them.
If you tried any of my recipes, I would love to hear from you, leave me a comment below. You can also connect with me on FACEBOOK, INSTAGRAM, and PINTEREST. I would love for you to follow along and discover more amazing recipes.
Show me what you are making, use hashtag #TDOARH

Santa Hat Cupcake Recipe
Ingredients
- 12 red velvet cupcakes (cooled completely)
- ½ cup salted butter (softened)
- ½ cup shortening
- 3-4 cups powdered sugar
- 1 ½ teaspoon vanilla extract
- 2 tablespoon milk
- 12 mini marshmallows
- 12 sugar cones
- 2 cup red candy melts
- 1-2 tablespoon shortening (if needed)
- sanding sugar or white sprinkles
Instructions
- Cream together the butter and shortening with an electric mixer until well blended, light and fluffy.
- Add in vanilla and milk and continue to mix until incorporated.
- Gradually add in powdered sugar mixing after each addition until you have added in 3 cups of powdered sugar. The frosting should be soft but hold its shape in stiff peaks, if necessary, add up to one more cup of sugar to get the desired texture.
- In the bowl of a double boiler (or a heat safe bowl over a pot of water) melt the red candy melts over medium heat. If necessary to create a smooth texture add 1- 2 tbsp of shortening.
- Set finished frosting aside.
- Using a bread knife trim about 1 ½ inch off of the top (the open end) of each ice cream cone to make them shorter. It works best to score all the way around and then snap off the cone.
- Place wax or parchment paper on your table or counter top.
- Roll the cones in the melted candy melts to evenly coat the outside. Place them on prepared wax paper to cool.
- Place sanding sugar or white sprinkles in a shallow dish.
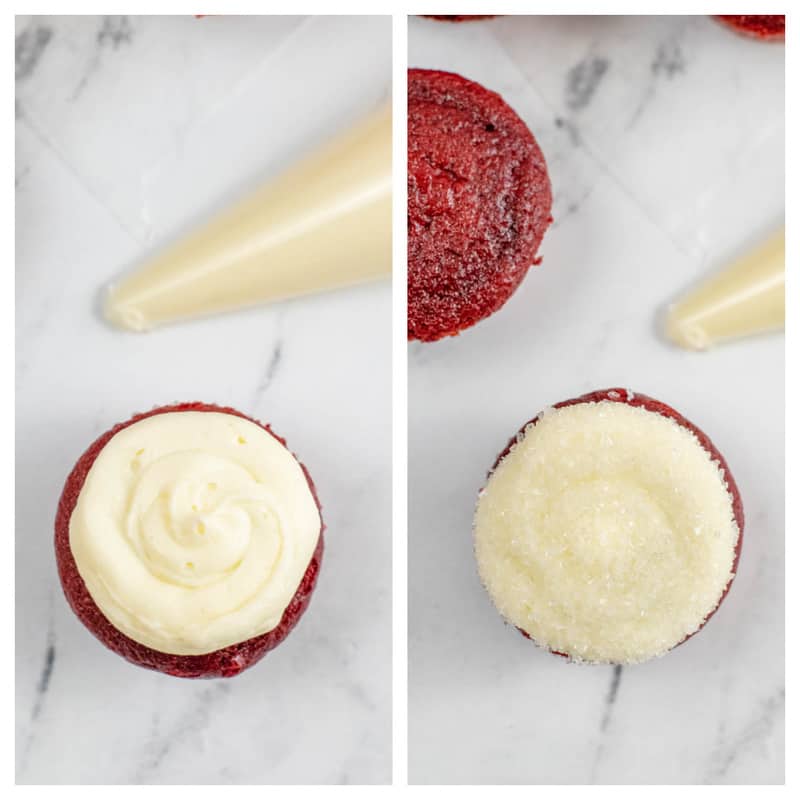
- While the cones are cooling place frosting in an icing bag fitted with a round tip or with the tip cut off. Pipe frosting onto the cupcakes. Gently dip the frosted cupcakes into the sanding sugar to coat frosting.
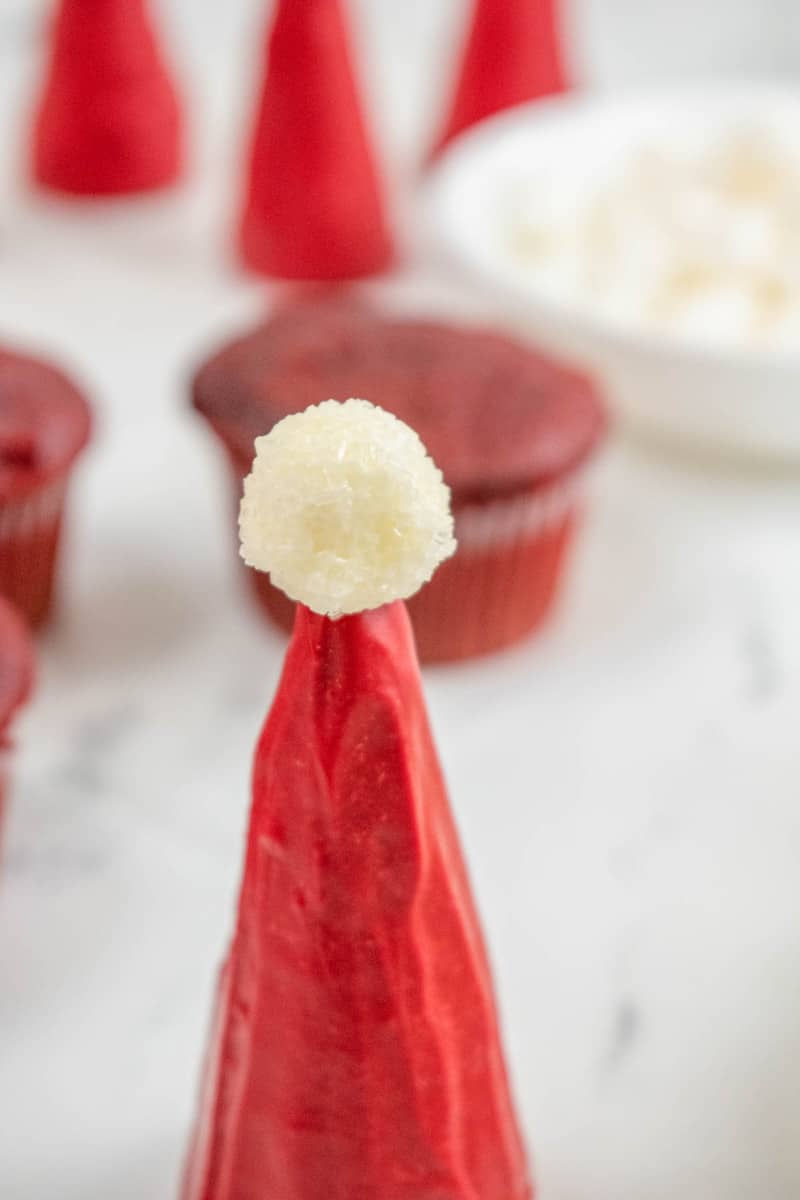
- Next place a marshmallow on a toothpick or bamboo skewer. Coat the marshmallow with frosting and then dip it into the sanding sugar or sprinkles to coat and create the pom pom for the Santa hat.
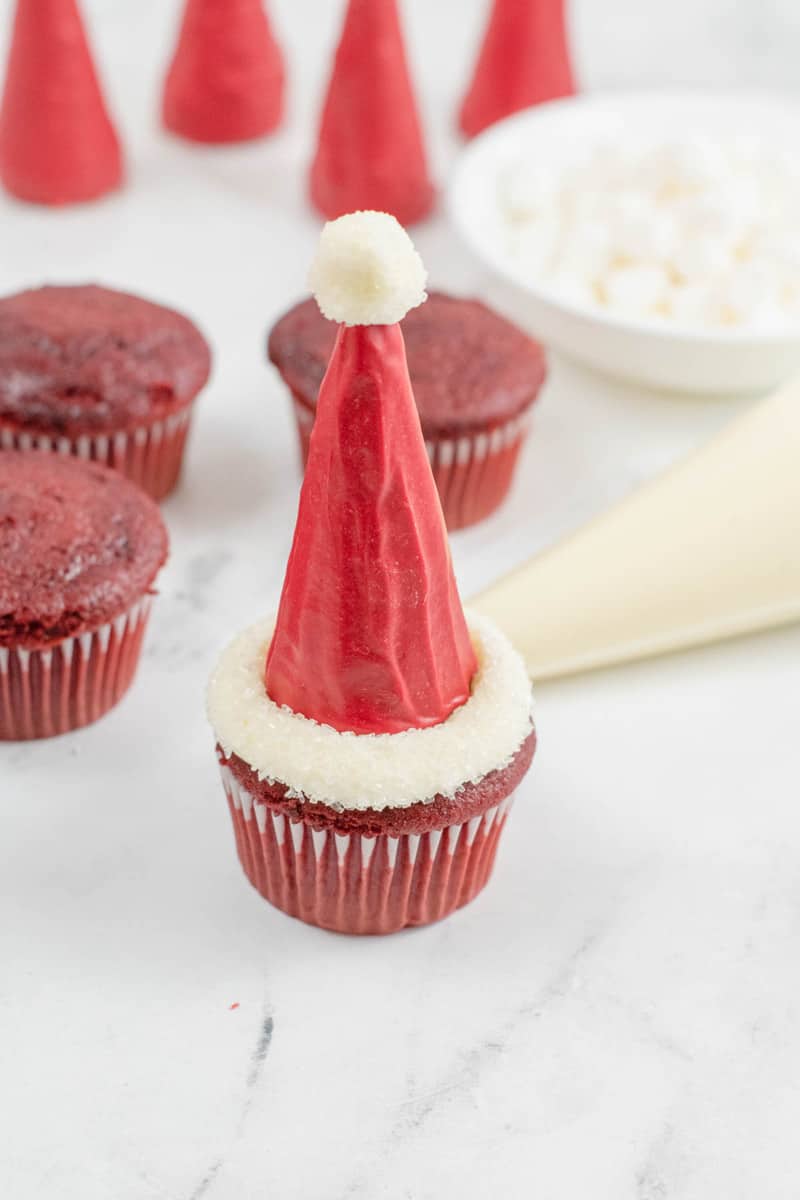
- Put a small dot of frosting on the tip of the ice cream cone and gently press the marshmallow into place. Repeat until all of the cones are finished.
- Finally, gently press the cones into the frosting on the cupcakes.
Notes
- Tip: The frosting should be soft but still hold up. If necessary add up to one more cup of powdered sugar to make it the right texture.
- Tip: Can substitute coconut oil instead of shortening if you wish.
- Tip: It works best to score all the way around and then snap off the cone.
Nutrition

Leave a Reply