This post contains affiliate links. Please see our disclosure policy.
These easy to make Sausage Balls are made with Bisquick for an amazing appetizer or for a fast make ahead breakfast to eat on the go!

I love making quick and easy breakfast meals ahead of time.
These Sausage Balls are just perfect to make ahead and grab a couple when the morning rush comes and you have to get out the door to work and school.
Warm them up in the microwave really quick or eat them cold out of the refrigerator when on the run.
How to make Bisquick Sausage Balls:
These Breakfast Grab-and-Go Sausage Balls are perfect for a quick breakfast. The whole family will love them, and they are super easy to make.
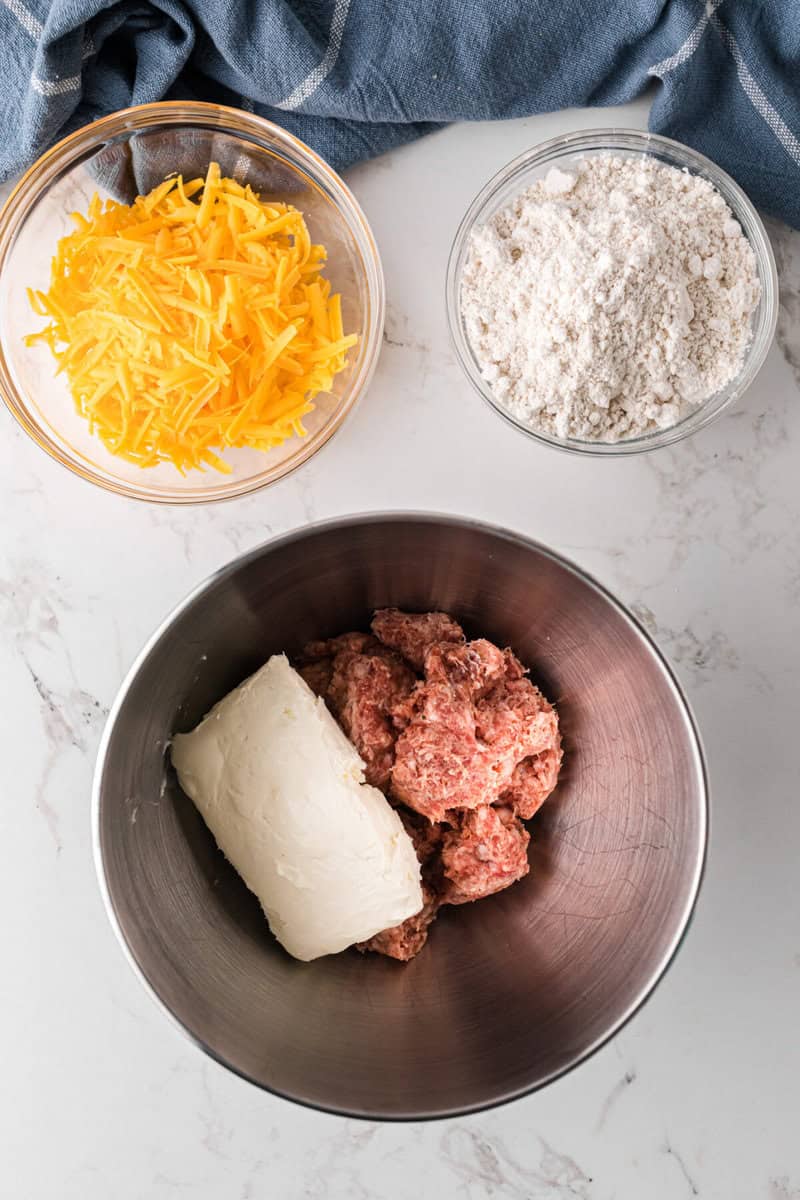
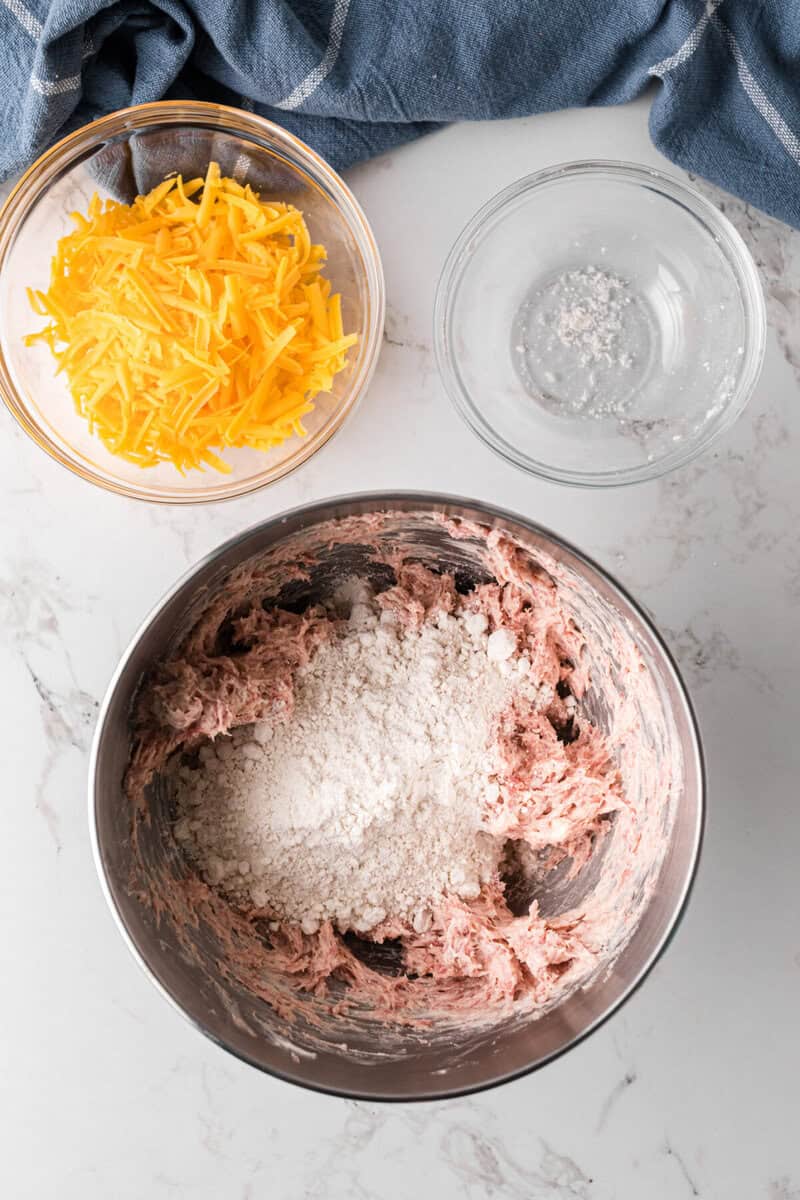
Start by mixing your cream cheese and the sausage together. I used a stand mixer to help get everything incorporated well. Next add the Bisquick and then the cheddar cheese.
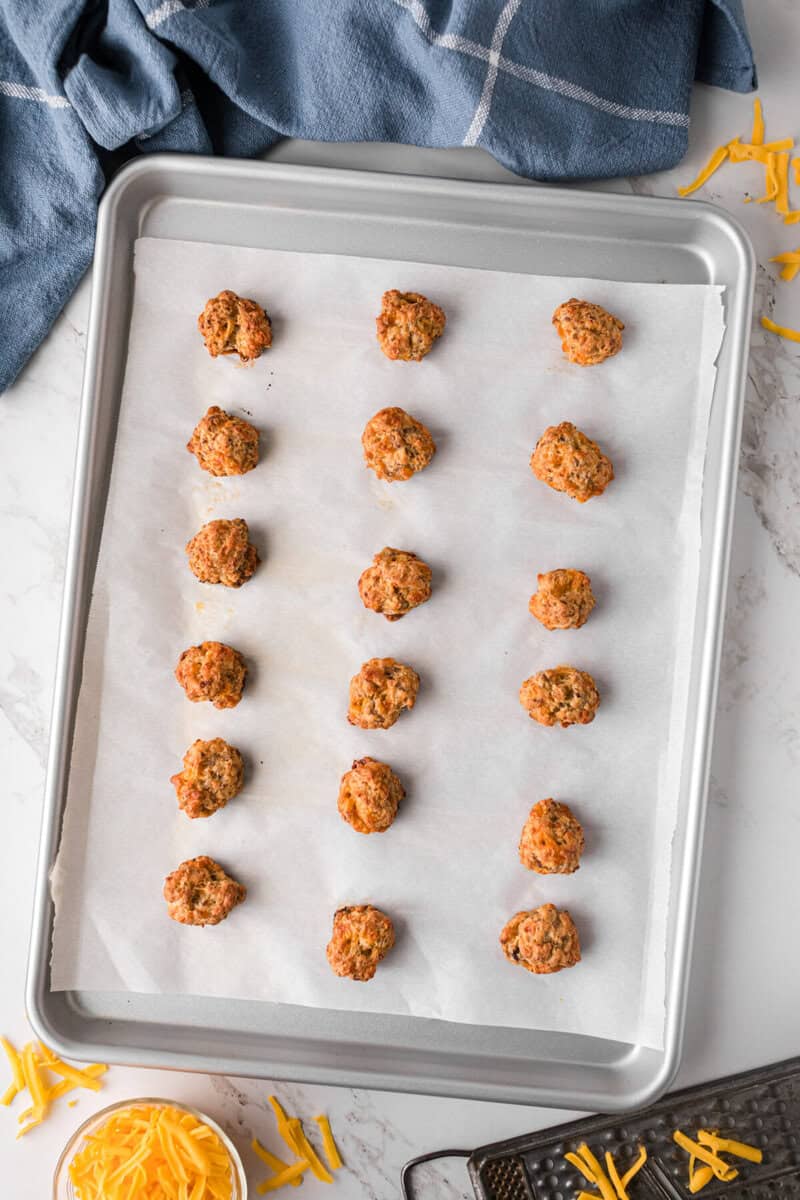
Form into 1-2 inch balls in your hand and then place on a baking sheet lined with parchment paper. Bake and enjoy or freeze for later!
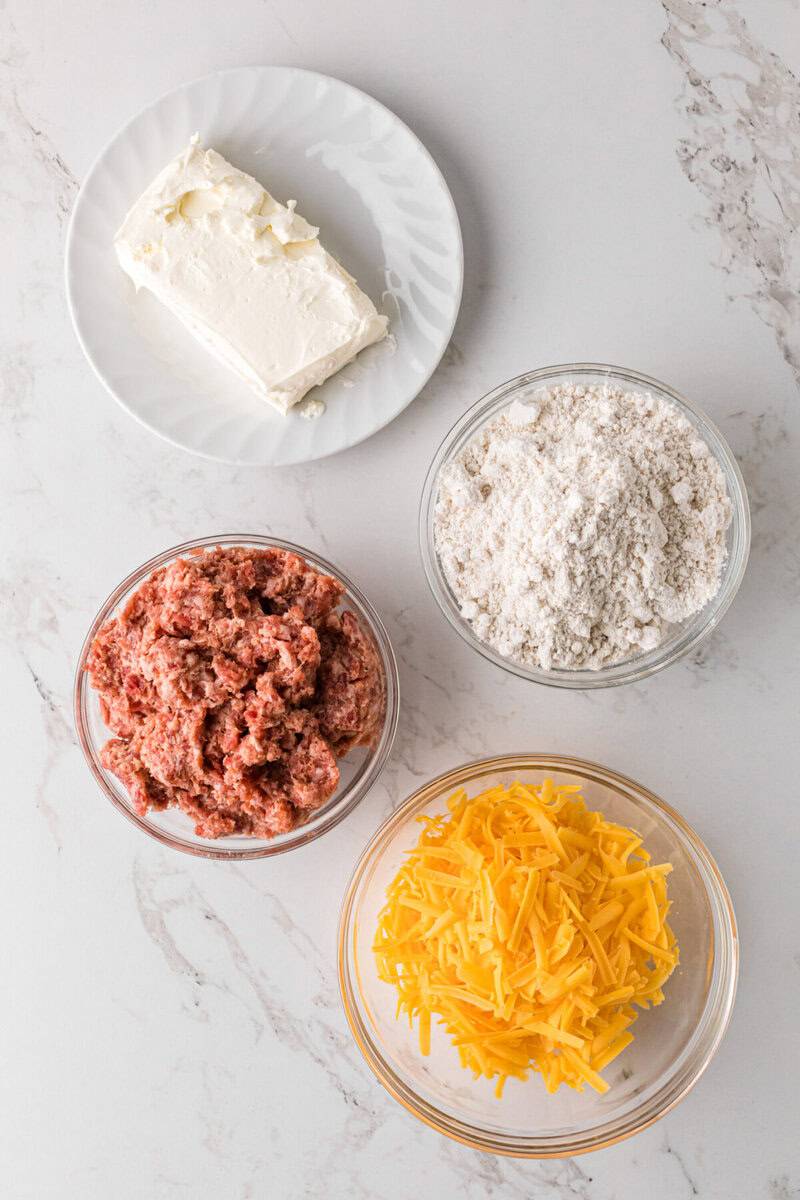
Ingredient Notes:
- Ground Sausage – Use your favorite brand of breakfast sausage for this recipe.
- Cream Cheese – one block softened to room temperature.
- Bisquick – dry pancake mix only, not made into pancake batter.
- Cheddar Cheese – use shredded cheddar cheese for this recipe.

Directions:
Step One: Preheat oven to 350 degrees. Prepare a baking sheet with parchment paper.
Step Two: Mix together sausage and cream cheese. Use clean hands or stand mixer with paddle attached to mix.
Step Three: Next up mix in the Bisquick.
Recipe Tip
Bisquick is a brand name boxed mix this a ready-made quick biscuit mix. You could use another brand quick biscuit mix but regular flour would work in it’s place.
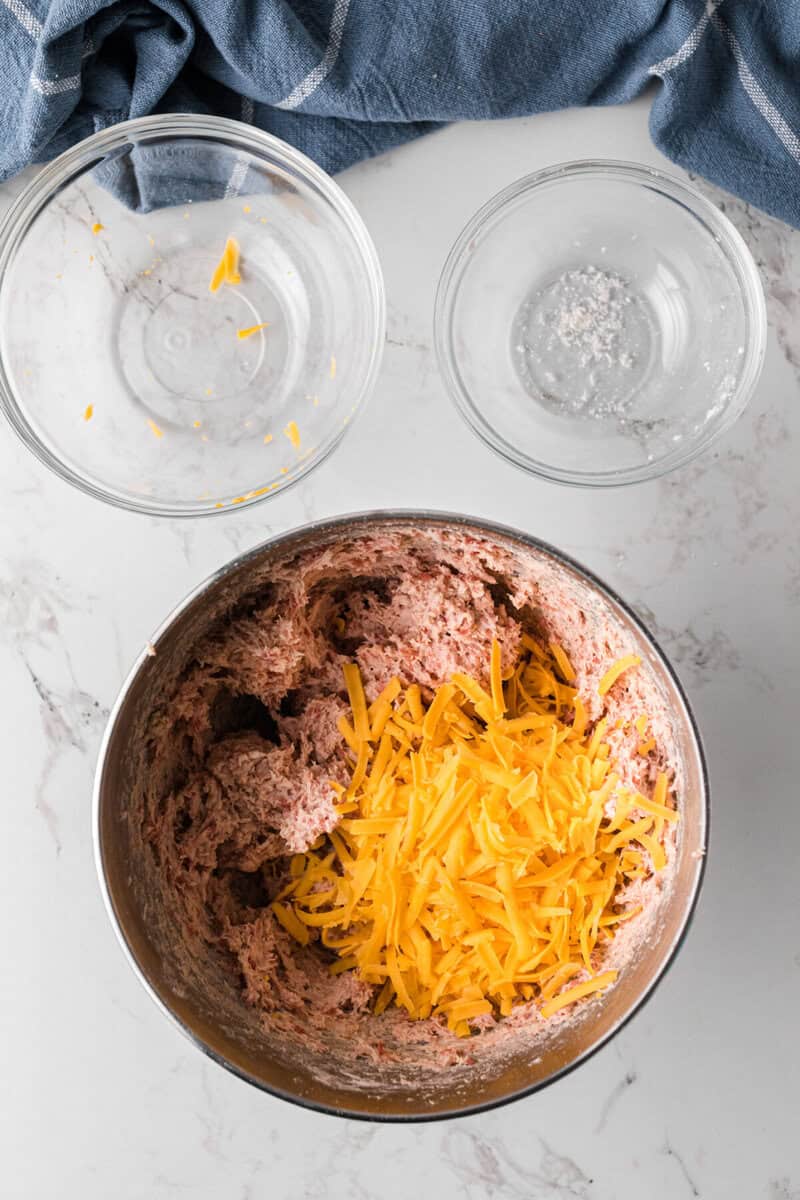
Step Four: Then finally fold in the shredded cheddar cheese.
Step Five: Scoop and form into 1 inch balls and place them on our prepared baking sheet.

Step Six: Place your uncooked sausage balls on the baking sheet into the fridge to chill for 10 minutes before baking.
Recipe Tip
Don’t skip this step! It’s important to chill them so they hold together.

Step Seven: Bake for 20-25 minutes until cooked through.
Can you make these ahead of time?
These are perfect to make ahead of time. I actually find they taste even better the next day after being reheated.
We love serving this as appetizers for parties and holidays so making them the day before saves us time on the big day.
You can also make a big batch for a quick breakfast. Once cooked and cooled store them in an air tight container in the refrigerator. Reheat in the microwave when you are ready to eat them.

How to store the sausage balls:
These can be stored a couple different ways. Store any leftover sausage balls in an air-tight storage container in the refrigerator. They will last 5 to 7 days in the refrigerator.
You can also make a large batch of these and freeze them for later. They will last for up to 3 months in the freezer. Pull them out and microwave them when you are ready to eat. You can microwave a couple or a bunch for about 4 minutes and have a quick breakfast!

Try some of my other favorite Breakfast Recipes:
Breakfast Pigs in a Blanket – These Breakfast Pigs in a Blanket make the best breakfast for busy mornings and can be enjoyed on the go. Made with sausage, crescent rolls, and rolled in cinnamon sugar they are sure to be a new family favorite.
Breakfast Quesadillas – These Breakfast Quesadillas are the perfect breakfast meal, and they are super tasty. Easy to make these quesadillas will be your family’s new favorite breakfast!
Sausage Egg Breakfast Braid – If it’s not morning you are about to wish it was! This super simple Sausage Egg Breakfast Braid is a breakfast speciality in our house. Sausage, eggs and cheese wrapped in a flaky crust will have you loving breakfast.

If you tried any of my recipes I would love to hear from you, leave me a comment below. You can also connect with me on FACEBOOK, INSTAGRAM, and PINTEREST. I would love for you to follow along and discover more amazing recipes.
Show me what you are making, use hashtag #TDOARH

Sausage Balls
Ingredients
- 1 pound ground sausage
- 8 oz cream cheese
- 2 cups Bisquick
- 1 1/2 cups shredded cheddar cheese
Instructions
- Preheat oven to 350 degrees. Prepare a baking sheet with parchment paper.
- Mix together sausage and cream cheese. Use clean hands or stand mixer with paddle attached to mix.
- Next mix in Bisquick. Then finally fold in the shredded cheddar cheese.
- Scoop and form into 1 inch balls and place them on our prepared baking sheet.
- Place your uncooked sausage balls on the baking sheet into the fridge to chill for 10 minutes before baking.
- Bake for 20-25 minutes until cooked through.
Notes
Nutrition


I’m a college student and make these every 2ish weeks— I’ll freeze them and just microwave them for breakfast in the morning and sometimes dinner!!! Such an easy and yummy recipe!
I’m so glad you liked them Anna!
They look delicious and certainly easy enough, I love that, especially this time of the year. I was just looking for a sentence or two, about to serve at Christmas. Are they pretty much eaten plain? Or should we have some sort of sauce (I.e. marinara,) or some sort of dip? Thank you!- Can’t wait to try them!
We eat them plain but I know others like to use marinara or bbq.
I thought the sausage was supposed to be cooked before mixing…UGH!!!
Kay in my experience if you cook the sausage first, they get during baking and are crumbly afterwards.and they don’t really hold together that well like they do with the raw sausage that might not be your experience, but that was mine
Kat in my experience if you cook the sausage first, they get during baking and are crumbly afterwards.and they don’t really hold together that well like they do with the raw sausage that might not be your experience, but that was mine