This post contains affiliate links. Please see our disclosure policy.
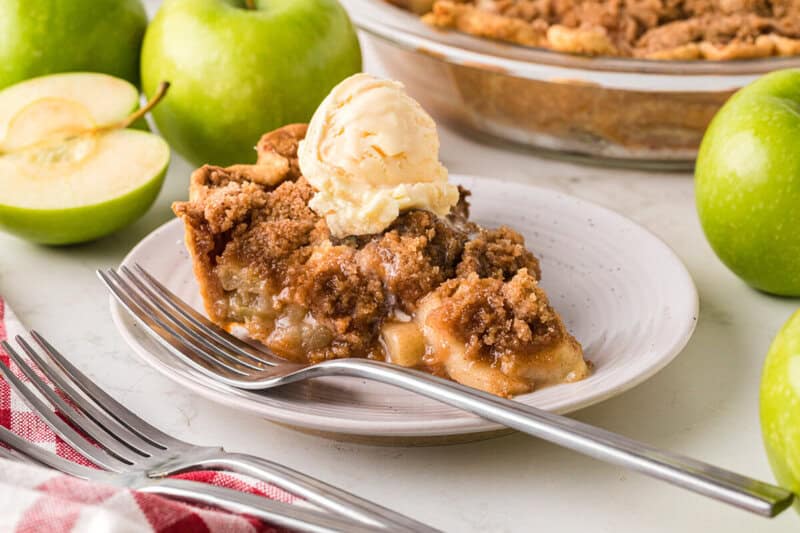
This Dutch Apple Pie is one of my all time favorites. Something about warm apples, brown sugar, and whipped cream that make the perfect combination.
This pie is rated 5 stars for a reason and is loved by everyone. It’s so easy to make. I’m sure you will love it just as much as my family does, you have to try this one!
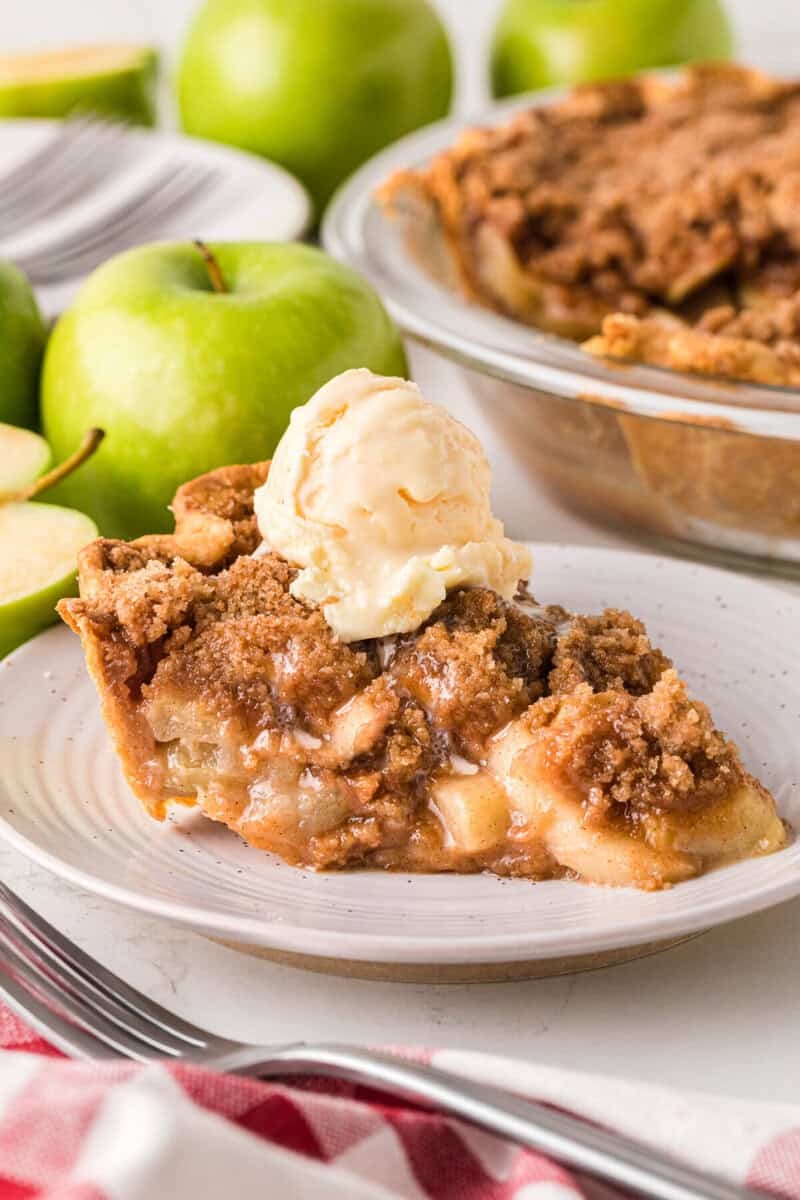
Table of Contents
- The Best Dessert Recipe:
- Ingredient Notes:
- How to make Dutch Apple Pie:
- Recipe Tip
- Dutch Apple Pie Topping:
- Recipe Tip
- Dutch Apple Pie Crust:
- Pie Pan Size:
- Dutch Apple Pie Filling Tips:
- Tip
- Next top your pie with your topping:
- Baking a Dutch Apple Pie:
- How to store a pie:
- Kitchen Tools for Apple Pie:
- Try some of my other favorite Apple Pie inspired recipes:
- Dutch Apple Pie Recipe
The Best Dessert Recipe:
I love a good Classic Apple Pie Recipe, but the crumbly topping on this Dutch Apple Pie is so good I may have a hard time picking which one will be going on my table for dessert.
I could make both Dutch Apple Pie and the classic, but I also want, cherry pie, chocolate pie, peach pie, pumpkin pie, oh have I mentioned that I really like pie? I hope my guests do as well.
When planning desserts for a holiday or get together I could honestly skip the cake anytime and go without. Pie, on the other hand, is my kind of dessert.
Sweet and warm fruit with a flaky crust then topped with whipped cream or ice cream… or both!
In my option there is no better dessert! Since I love apple pie so much I made it in several different forms.
Make sure to check out all my favorites when you are down with this recipe.
Ingredient Notes:
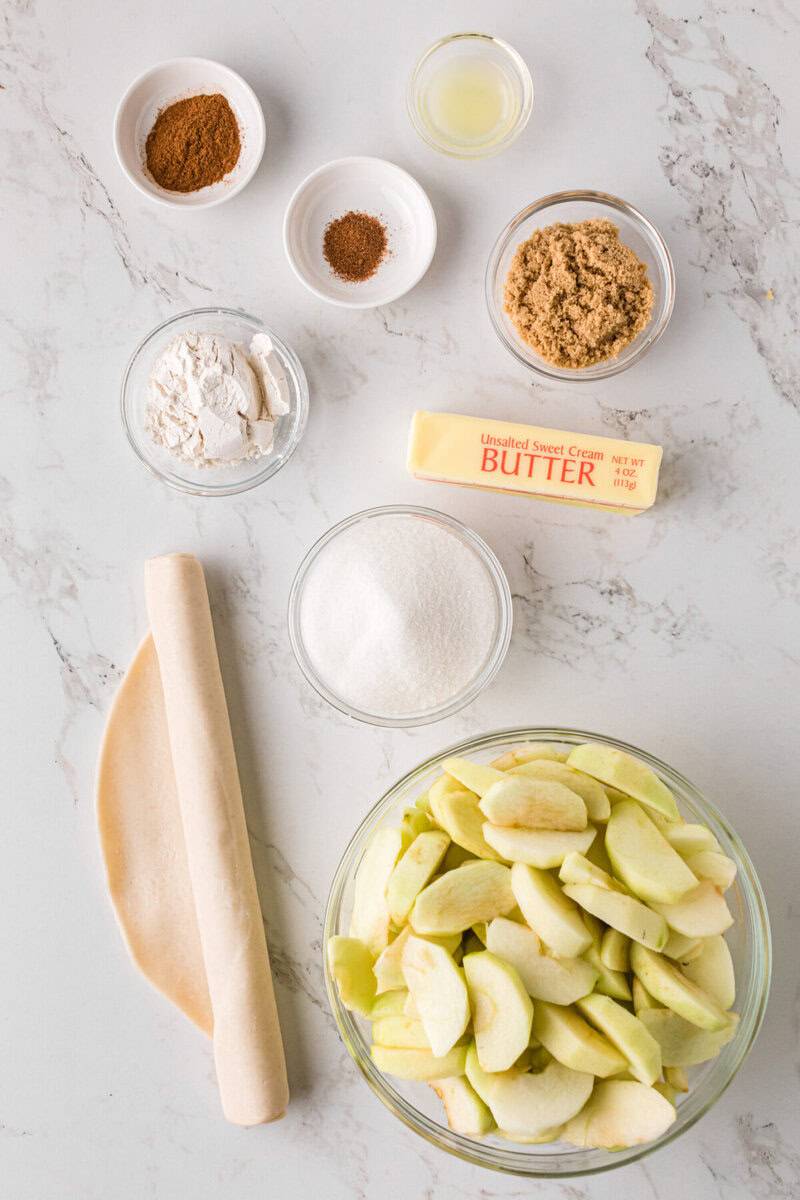
Crust:
- Store bought pie crust works great for an easy shortcut or you could use my easy homemade crust recipe.
Filling
- Granny Smith apples: that have been peeled, cored, and sliced.You can mix in Honey crisp or Fuji apples for a slightly sweeter filling
- Lemon juice: This will help keep your apples from browning.
- White sugar and Brown sugar
- Flour: This will make your filling thicker and not so runny. Tapioca starch would be a great gluten free option.
- Seasoning: I used both ground cinnamon and nutmeg
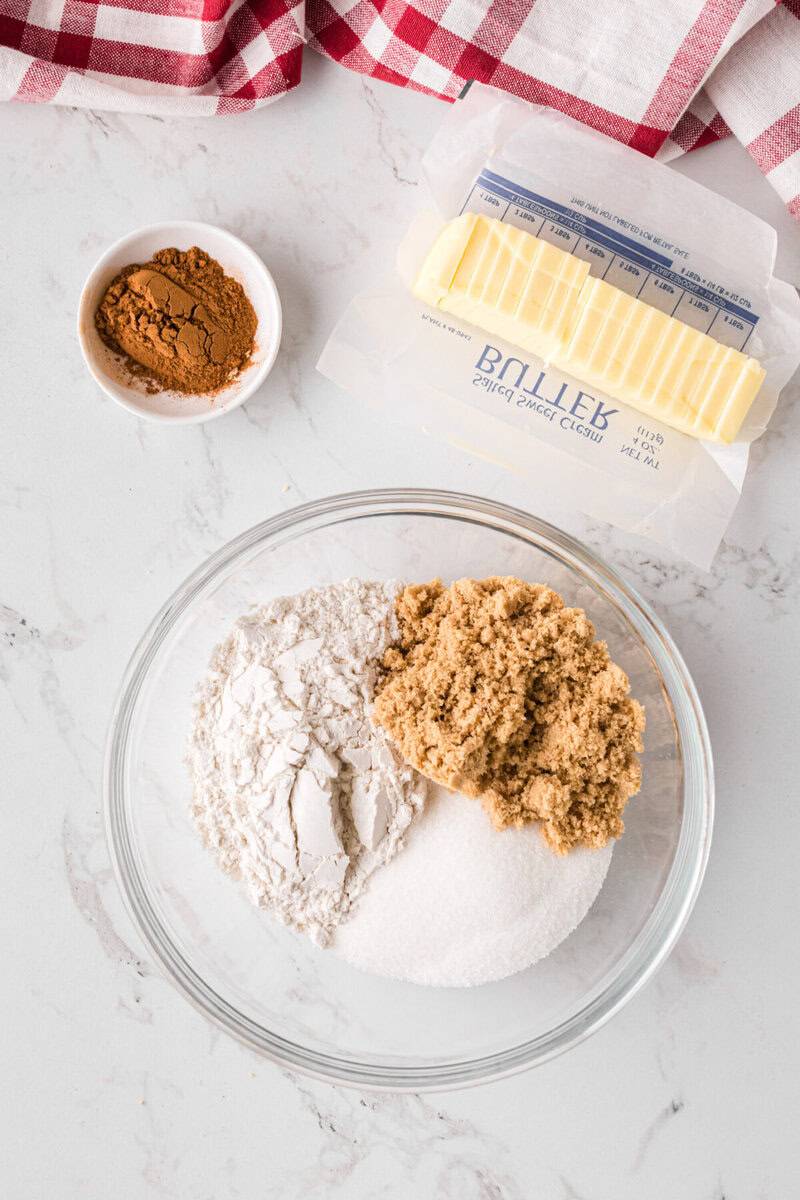
Topping
- Flour: This will help make crumble your topping.
- Brown sugar and White sugar
- Cinnamon
- Butter: You want your butter to be cold, pull it right out of the fridge when you are ready.
How to make Dutch Apple Pie:
Start by preheating your oven to 375 degrees F. Then peel, core, and slice your apples.
For this recipe, I used granny smith apples.
Once peeled I used an apple slice then sliced the apples again.
You want them pretty thin. Once they came out of the apple slicer I sliced each slice into at least 4 other thinner slices.
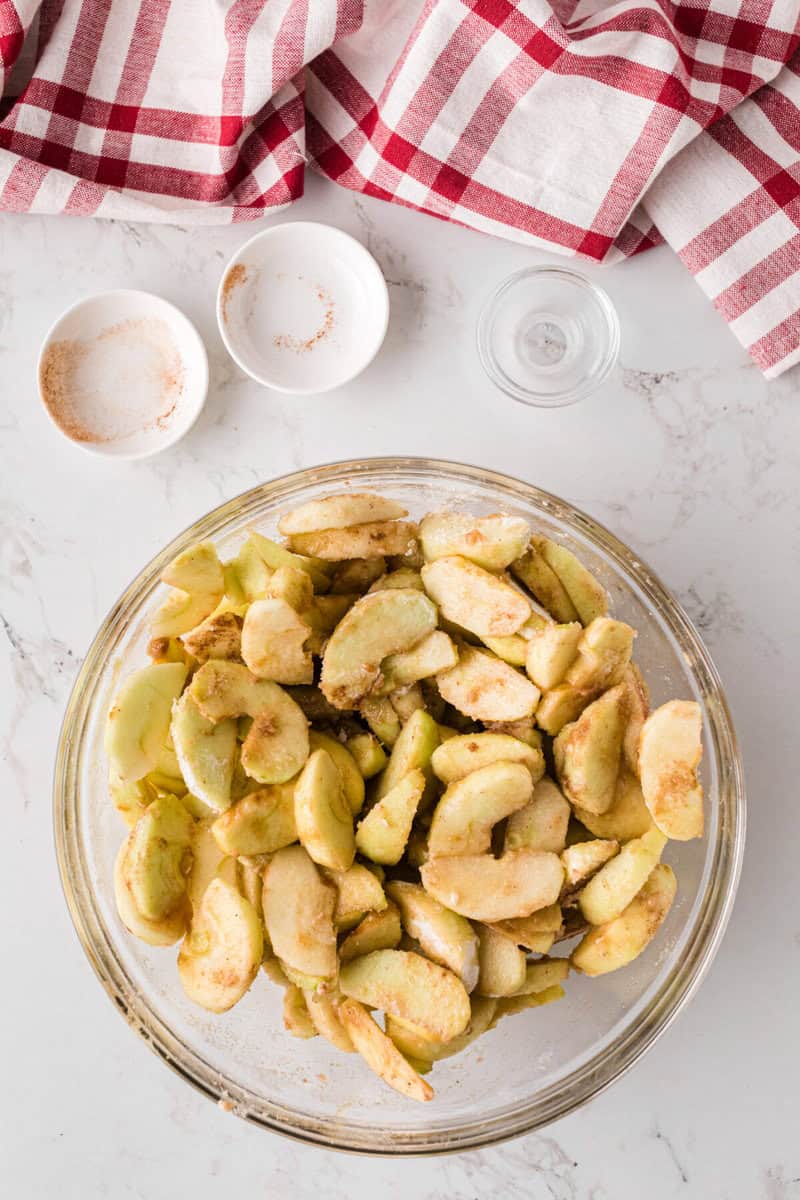
Once your apples are ready you can place them in a large mixing bowl.
Place the rest of the filling ingredients into the mixing bowl, and mix until apples are coated.
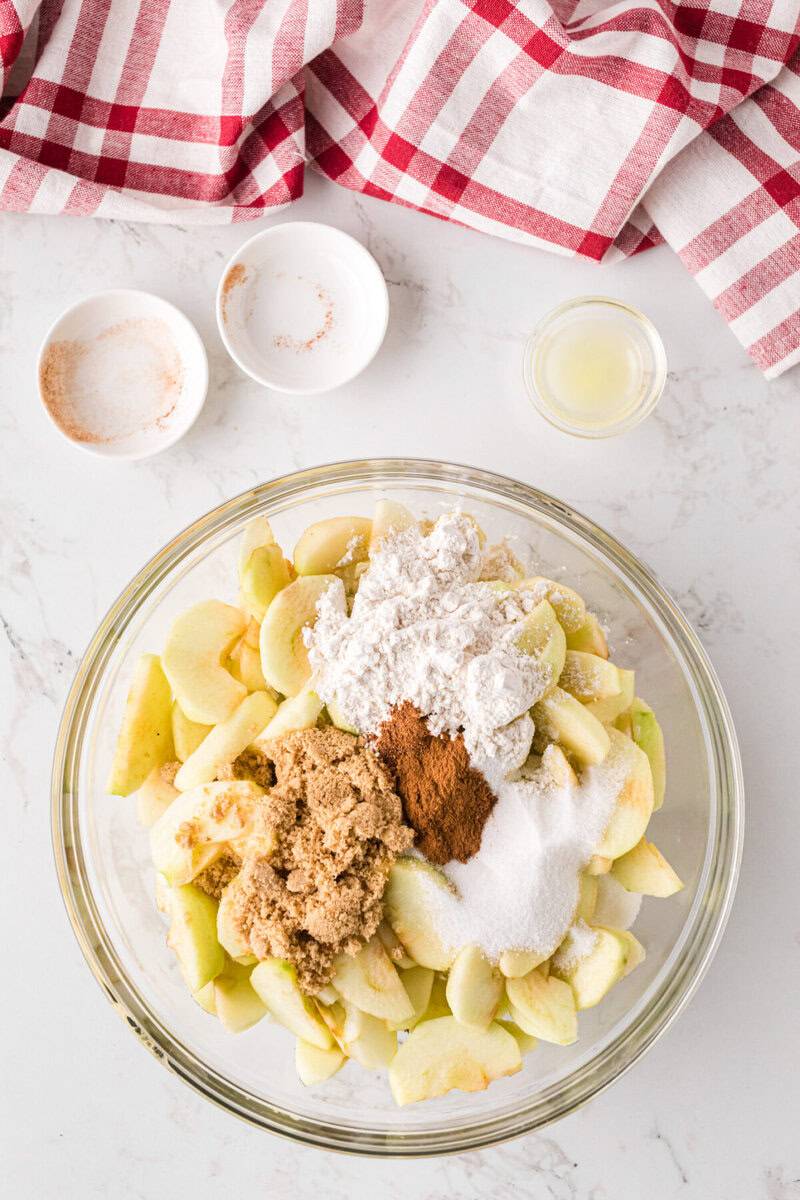
Allow your apples filling to sit for at least 5 minutes before adding them to the crust.
You can work on the topping while you wait for your apples to be ready.
Recipe Tip
Don’t skip this step! When adding sugar to your apples it will release water that is in the fruit. You don’t want this water sitting in the bottom of your pie so allow your apples to sit and rest will give your apple time to draw that water out in the mixing bowl. The longer the sit the better. I would give it 1-2 hours to be safe.
Dutch Apple Pie Topping:
While you allow your apples to rest start working on your crumble topping.
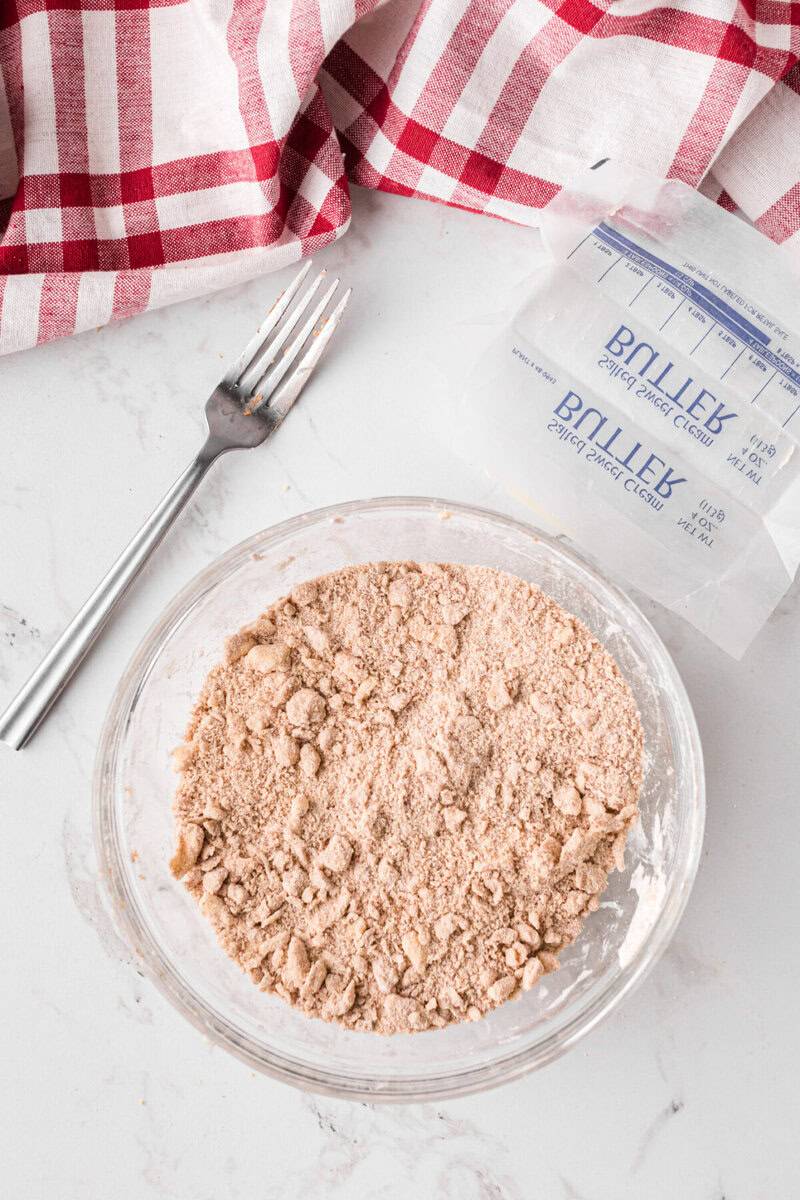
In a separate mixing bowl use a fork to combine all topping ingredients until the mixture is well combined and crumbly. You can use a fork but I also like to get in with my hands.
Pinching the butter into small pieces and having them coated in the dry ingredients.
Make sure you have a small crumble before adding it to the top of your pie.
When the topping is done it will look like sand.
Recipe Tip
The topping calls for cold cold butter that will melt when baking. Make sure your butter is very cold and firm right out of the fridge when you are ready to use it. You want to break up the butter into small pieces with the rest of the ingredients.
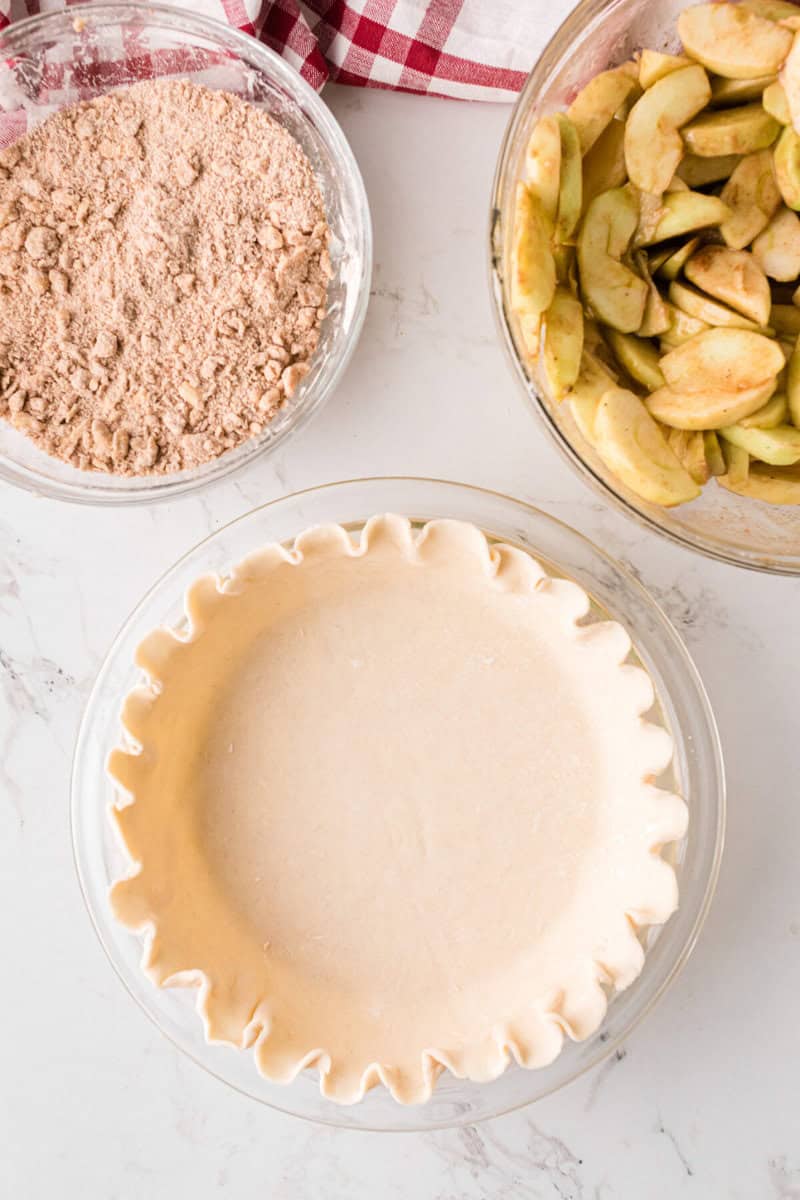
Dutch Apple Pie Crust:
Store-bought or a homemade crust will work fine for this recipe. Whatever you feel comfortable with.
Most crust recipes will have you make enough for the top and bottom crust. Same as using a store-bought crust.
For this recipe, you will only need one crust since you will have the crumble topping.
If you want to make it homemade then try out my recipe homemade pie crust.
It’s so simple to make and taste amazing! Once your pie crust is ready you can place it in an empty pie pan.
Pie Pan Size:
For this recipe, I used a standard 9-inch pie pan. I did place all 8 cups in the one pie pan.
The apples will cook down and all fit into the pan perfectly. You, of course, could add less for a less full pie.
Dutch Apple Pie Filling Tips:
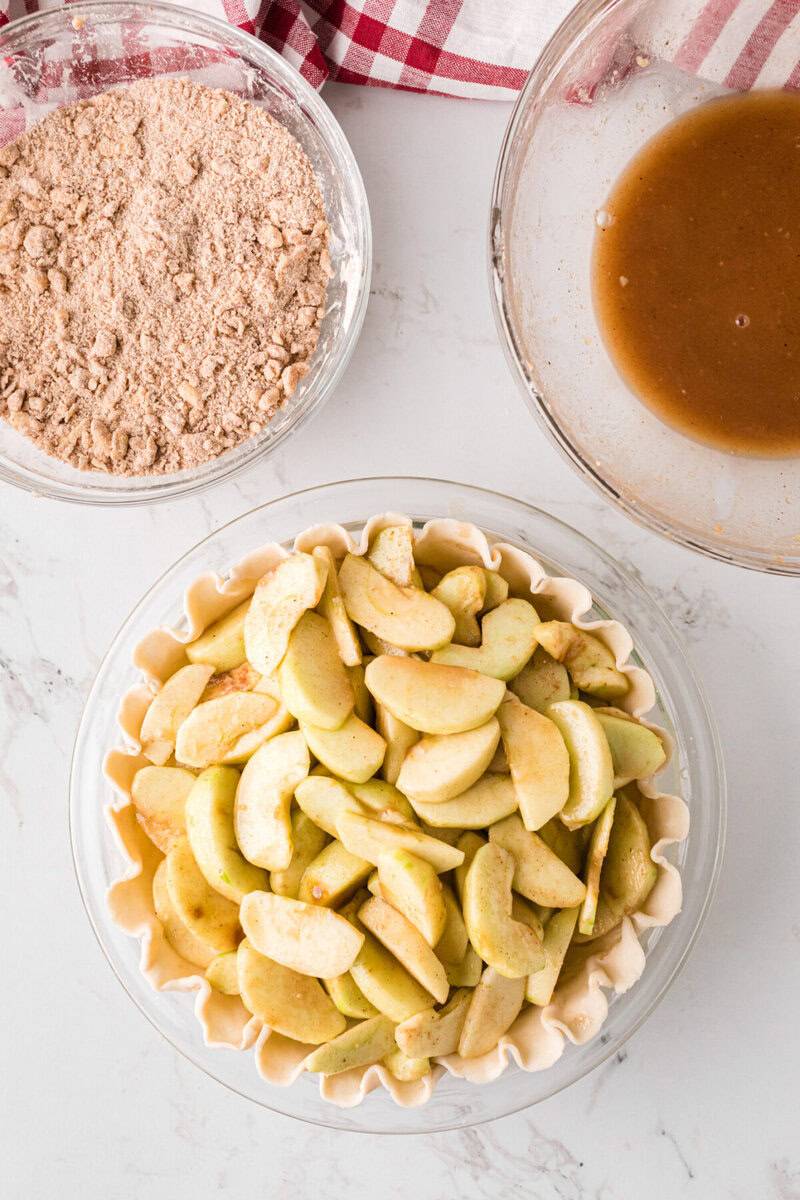
Your apple pie filling should be ready to be placed into your pie crust.
To make sure I don’t get any of that juice I would suggest using a slotted spoon to scoop out the apples and place them into your crust.
Slowly place all your apples into your pie crust. In the end, you should have a very full pie and juice leftover in your mixing bowl.
This could make your crust very soggy if you add it to your pie. When your apple pie is full then you are ready to top it.
Tip
You can see in the picture above all the juice that was leftover in my mixing bowl at the top corner.
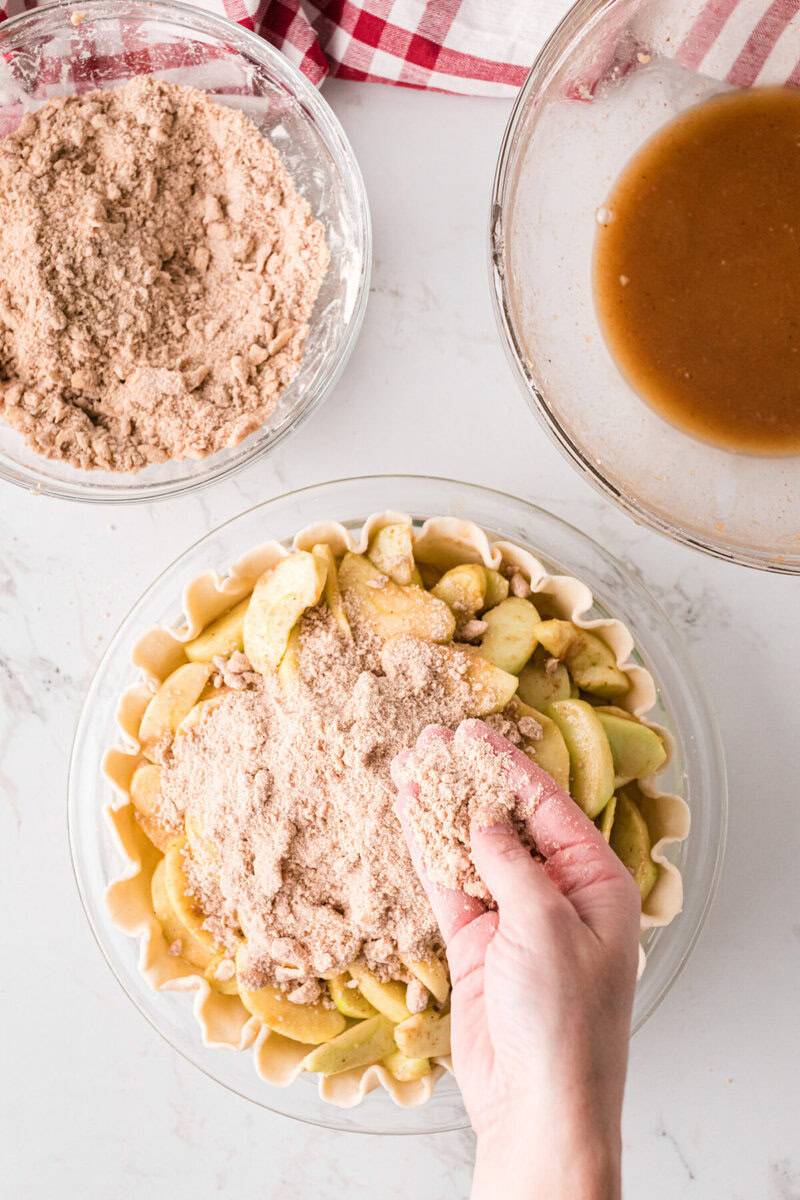
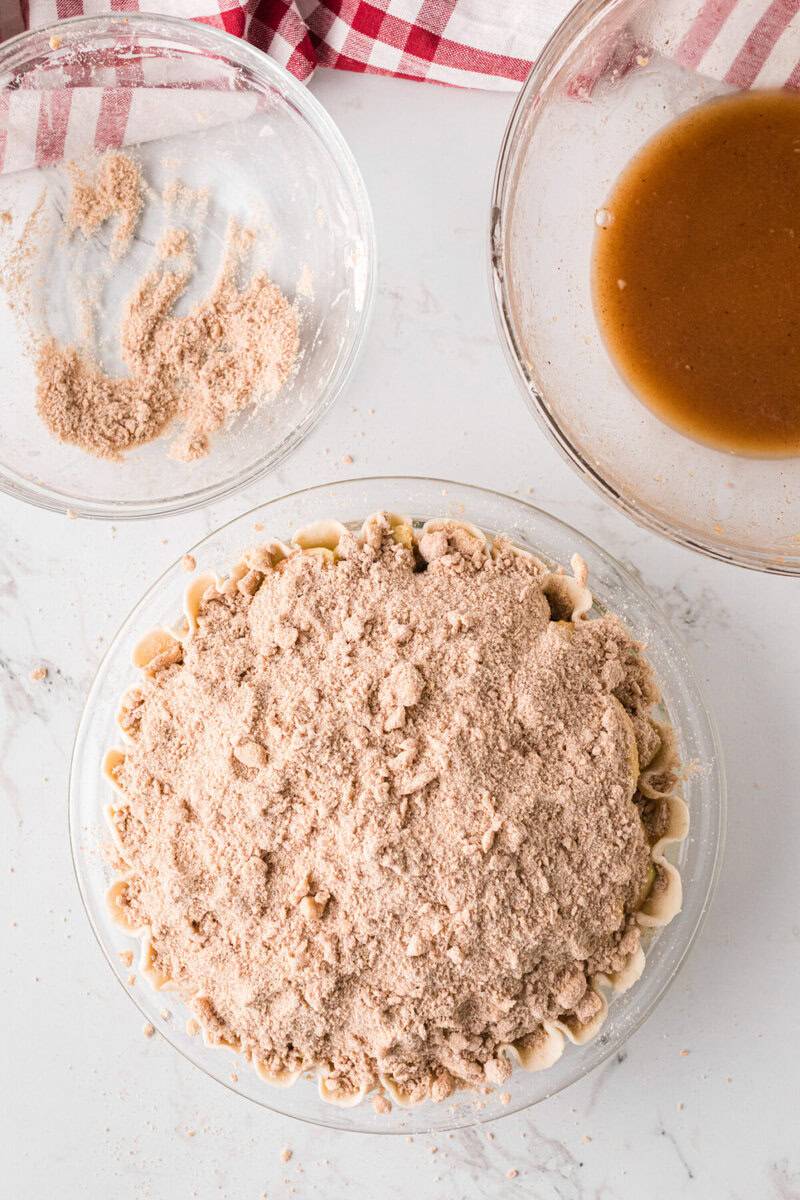
Next top your pie with your topping:
Use a crumbling, sprinkling motion over the pie to make sure you break up the topping and leave any leftover dust in the bowl.
You want to make sure everything you add to the top of your pie is well coated in your butter to prevent burning.
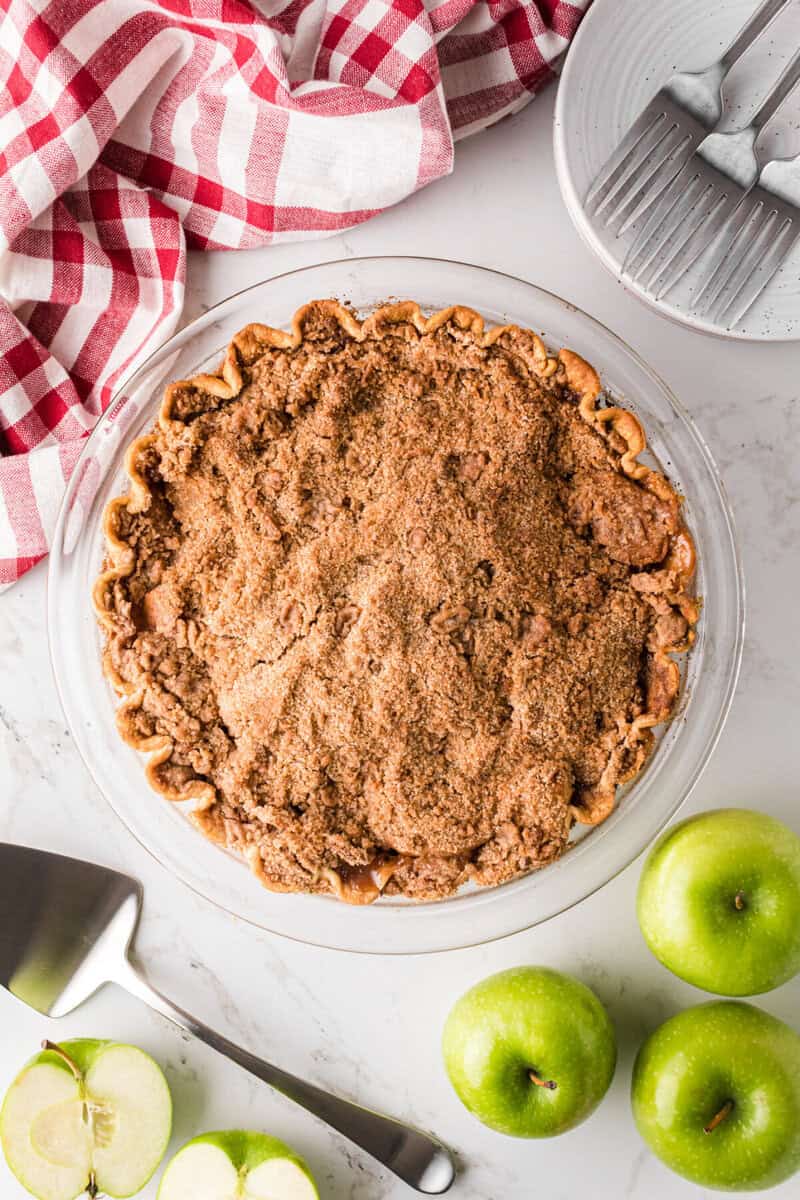
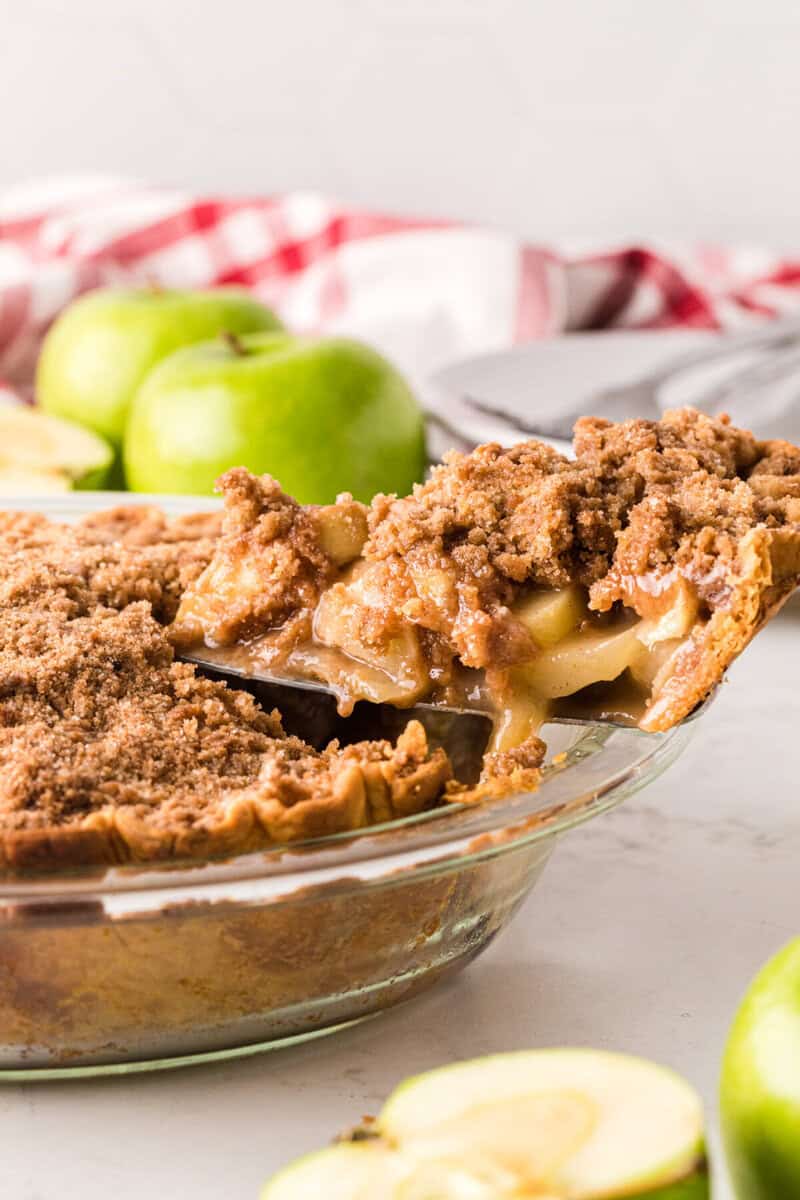
Baking a Dutch Apple Pie:
I like to play it safe and place a baking sheet under my pie.
This way if I have any leaking or dripping I can catch them and clean it easily. Place your pie in your preheated oven and bake for 50-55 minutes
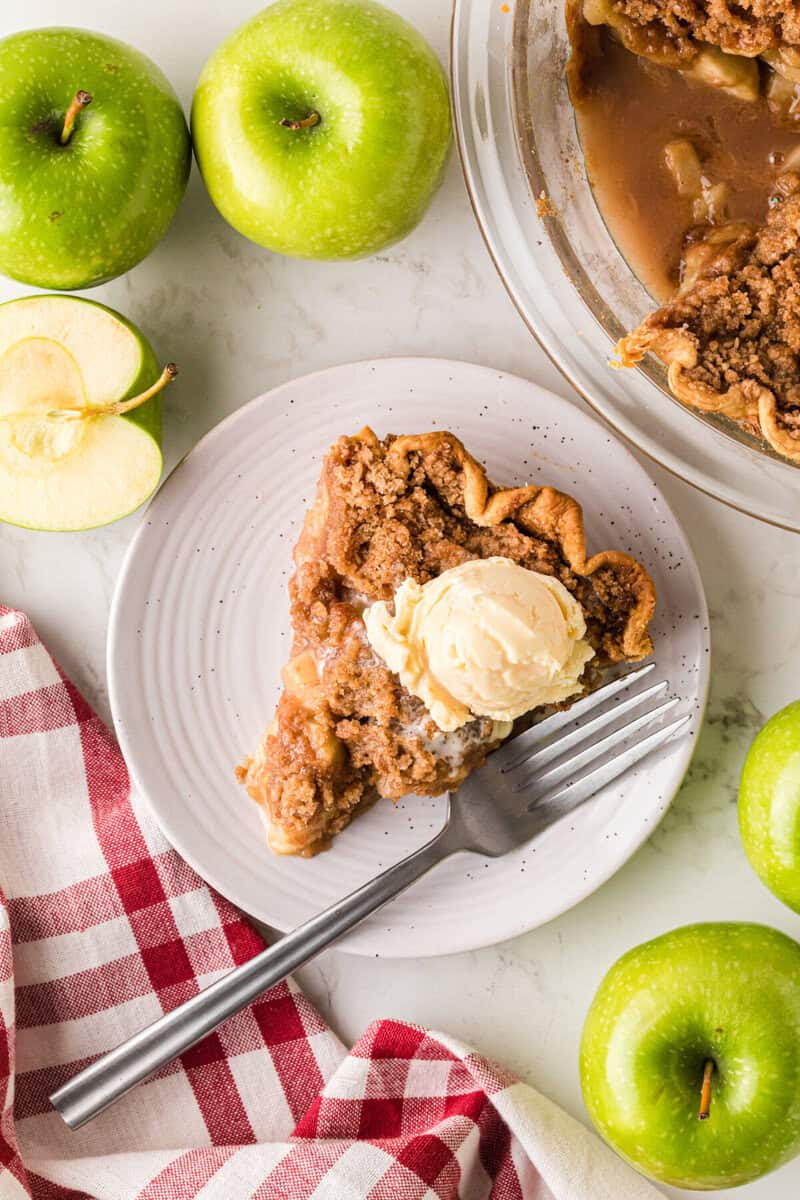
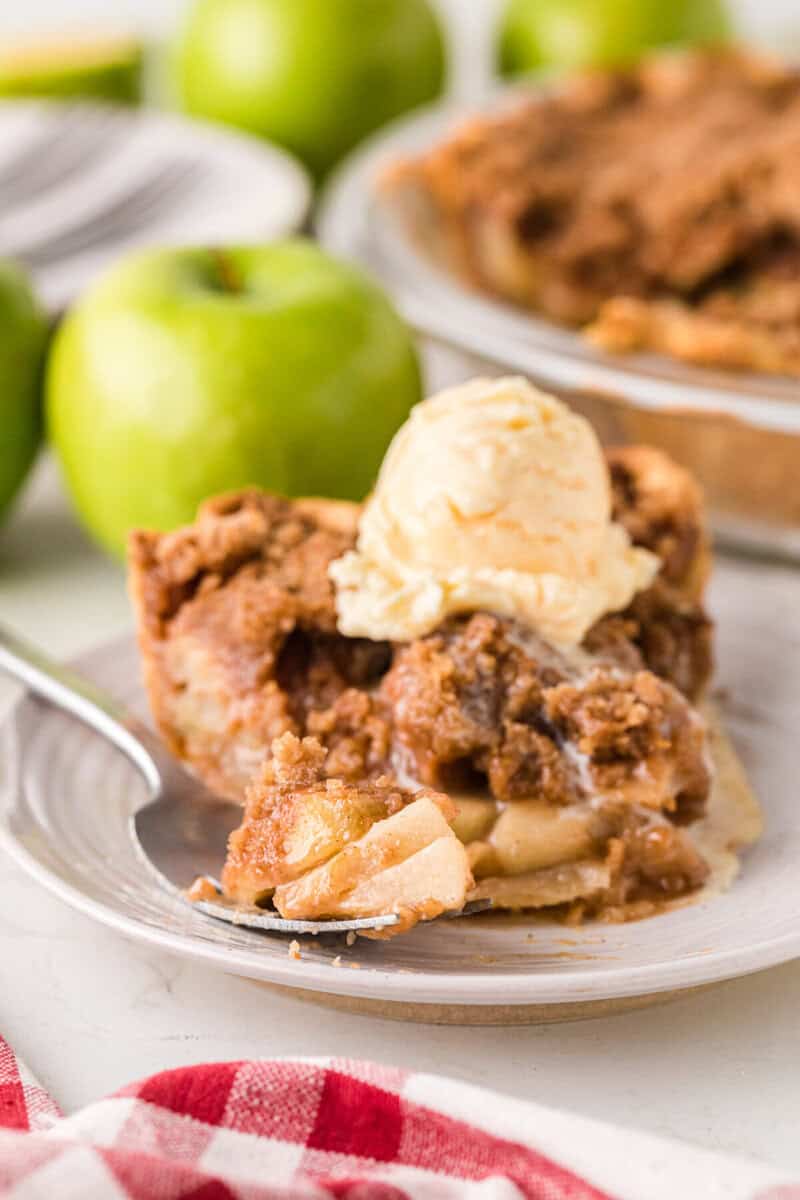
Once your pie is done allow it to rest for at least 10-20 minutes before serving.
The longer it rests the firmer it will be and easier to serve. I serve mine with whipped cream or ice cream on top.
How to store a pie:
Store this Dutch Apple Pie covered and in the refrigerator. It should last 5-7 days in the refrigerator. You can also freeze the pie. Once it’s baked, allow it to fully cool and then cover it well and freeze in an airtight container if you can. It will last in the freezer for about 3 months.
Kitchen Tools for Apple Pie:
Here are a few of my favorite kitchen tools for making a Dutch Apple Pie.
- Pie Pan (this one is amazing)
- Apple Slicer (I slice my apples with this and then use a knife to make the slices a little thinner)
- Apple Peeler (for quick peeling try this tool)
Try some of my other favorite Apple Pie inspired recipes:
Here are a few of my favorite dutch apple pie inspired recipes.
- Dutch Apple Pie Bread: This bread is so simple to make and had a great apple pie flavor.
- Dutch Apple Pie Bars: These bars are perfect for serving at a party or holiday get together.
- Apple Pie Cookies: These cookies are my favorite! They are so easy to make and the perfect fall cookie recipe.
- Apple Pie Dip: If you want to skip the pie set up try this dip recipe instead.
If you tried this Dutch Apple Pie or any of my recipes I would love to hear from you, leave me a comment below. You can also connect with me on FACEBOOK, INSTAGRAM, and PINTEREST. I would love for you to follow along and discover more amazing recipes.

Dutch Apple Pie
Ingredients
Crust:
- Store bought or use my homemade recipe
Filling
- 8 cups Granny Smith apples. cored, (peeled, cored, and sliced)
- 1 tablespoon Lemon juice
- 3/4 cup White sugar
- 1/4 cup Brown sugar
- 1/4 cup Flour
- 1 teaspoon Cinnamon
- 1/4 teaspoon Nutmeg
Topping
- 1 cup Flour
- 1/2 cup Brown sugar
- 1/2 cup White sugar
- 1 tablespoon Cinnamon
- 1/2 cup Butter, (cold)
Instructions
- Preheat oven to 375 degrees F. Roll our crust and place it in the bottom of a pie pan and set aside.
- In a mixing bowl put all filling ingredients, and mix until apples are coated. Allow your apples filling to sit for at least 5 minutes before adding them to the crust.
- Meanwhile, in a separate mixing bowl use a fork to combine all topping ingredients until the mixture is well combined and crumbly. You can use a fork but I also like to get in with my hands. Pinching the butter into small pieces and having them coated in the dry ingredients.
- Spoon in apple filling then top with topping. Bake for 50-55 minutes. Serve warm with ice cream or whipped cream.
Notes
- You want your apples sliced pretty thin. Once they came out of the apple slicer I sliced each slice into at least 4 other thinner slices.
- When adding sugar to your apples it will release water that is in the fruit. You don’t want this water sitting in the bottom of your pie so allow your apples to sit and rest will give your apples time to draw that water out in the mixing bowl.
- The topping calls for cold cold butter that will melt when baking. Make sure your butter is very cold and firm right out of the fridge when you are ready to use it. Make sure you have a small crumble before adding it to the top of your pie. When the topping is done it will look like sand.
- I used a standard 9-inch pie pan
- To make sure I don’t get any of that juice I would suggest using a slotted spoon to scoop out the apples and place them into your crust.
- I like to play it safe and place a baking sheet under my pie. This way if I have any leaking or dripping I can catch them and clean it easily.
Nutrition


I’m going to use store bought pie crust, do you only use one crust for the bottom & another for the top & then sprinkle the topping or do you just sprinkle top topping on top of the filling?
I just use one pie crust and then the topping and save the otters crust for another pie. I have a video of me making it on my youtube channel of you want to check it out. https://www.youtube.com/watch?v=W0ftDtY5IGg
If I’m using store bought crust should I bake the crust before adding the filling
No you will not need to cook it ahead of time. Just bake with the filling inside. Hope you enjoy it Suzanne!
Made this apple pie yesterday and it turned out wonderful. I had extra pie crust dough from making a Thanksgiving pie and I didn’t want to waste it, so a dutch apple pie was in order. I used Arkansas Black apples, which gave the pie great apple flavor. It was easy to make and looked gorgeous. Great recipe, that I will be keeping in my recipe board.
So glad to hear that!! =)
Made this pie today to take to our friends’ Thanksgiving feast. Had the best compliment on it from my husband. He said it tasted just like his mom used to make. Sadly, she passed in 2015. Thanks for the recipe and for bringing a little bit of “home” to our Thanksgiving. Hope you have a wonderful holiday!
Aww Jacki thank you so much for coming back to tell me that! It made my night. I am so happy to know that you all enjoyed the recipe so much and it brought joy to you all. Holidays without loved ones is so rough. Lot of love to you and your family <3
I’m so excited to see how this turns out! If I prepare the filling night, is the lemon juice enough to keep the apples from turning brown?
If you are preparing this and keeping it in the fridge overnight I think you could add 2 tbsp of the lemon juice. Give them a really good mix so they are all coated. Hope you enjoy the recipe Dayan!
I am making this for the first time (lord help me), but this might be a crazy questions but do I not need an apple like filling? And for the butter, do I need salted or not salted?
Nope the apples are your filling. The flour will help it get that pie like filling when baking. I use unsalted butter because I like the pie sweet but it’s mostly personal preference. Good luck Tayler! I hope you enjoy the pie, you will have to let me know how it turns out.
I’d like to make this for thanksgiving but I’d like to bake it ahead of time. Like the night before. Does it save well? How would you reheat it? Or would it turn out much better to bake it right before leaving? I don’t want to compromise the taste/consistency!
You can always make the apple filling and even the crust and topping (all stored in the fridge) the night before and then bake in the morning to make sure it is crispy. That would save you some time. Lay out your crust in the pie pan and place it in the fridge with the filling and topping on the side. Put it all together an bake the next morning. This way you it will taste fresh but you got all the work done before. I hope you enjoy it Kelsey!
Soo delicious! Made this tonight for dessert with friends and not a bite left…I’m going to make it again for thanksgiving! Thank you for such a yummy recipe!
Yah! I am so glad you enjoyed it Azra!! Hope you all enjoy it on Thanksgiving as well!
Tried this recipe tonight. It was very delicious, with just enough sweetness. I didn’t have all purpose flour, so I used 00. In my opinion the topping turned out a bit too dry and too hard. I’m thinking it was because of the flour used. I Will definitely give this a second try with all purpose flour. Very yummy!
Hope it turns out better next time Maria! You could always add just a tad more butter to help it not be dry. Enjoy =)
Can you make this pie ahead of time and warm it up to serve later?
Yeah! Just chili in the prepare and then before baking place in the fridge until ready to bake!