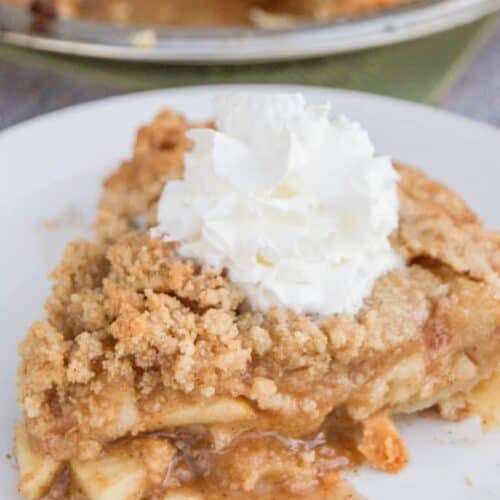
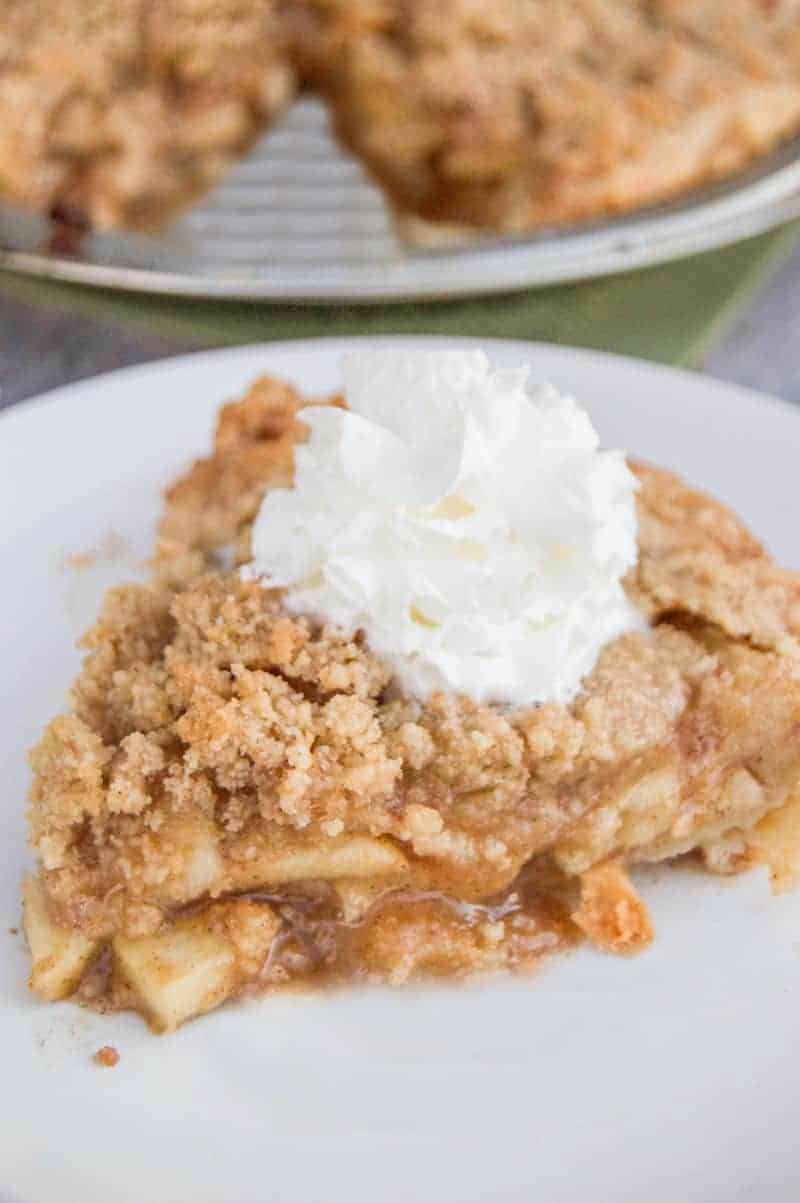
This Dutch Apple Pie is one of my all time favorites. Something about warm apples, brown sugar, and whipped cream that make the perfect combination.
This pie has rave reviews and is loved by everyone plus it's so simple to make. I'm sure you will love it just as much as my family does, you have to try this one!
Best Dessert Recipe:
I love a good Classic Apple Pie Recipe, but the crumbly topping on this Dutch Apple Pie is so good I may have a hard time picking which one will be going on my table for dessert.
I could make both Dutch Apple Pie and the classic, but I also want, cherry pie, chocolate pie, peach pie, pumpkin pie, oh have I mentioned that I really like pie? I hope my guests do as well.
When planning desserts for a holiday or get together I could honestly skip the cake anytime, and go without. Pie, on the other hand, is my kind of dessert.
Sweet and warm fruit with a flaky crust then topped with whipped cream or ice cream… or both 😉
In my option there is no better dessert! Since I love apple pie so much I made it in several different forms.
Make sure to check out all my favorites when you are down with this recipe.
How to make Dutch Apple Pie:
Start by preheating your oven to 375 degrees F. Then peel, core, and slice your apples.
For this recipe, I used granny smith apples.
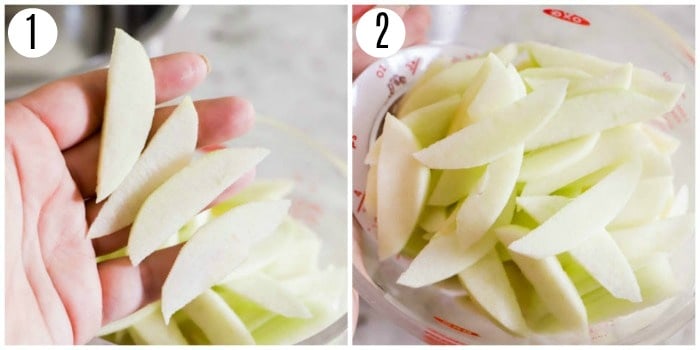
Once peeled I used an apple slice then sliced the apples again.
You want them pretty thin. Once they came out of the apple slicer I sliced each slice into at least 4 other thinner slices (see picture 1 and 2).
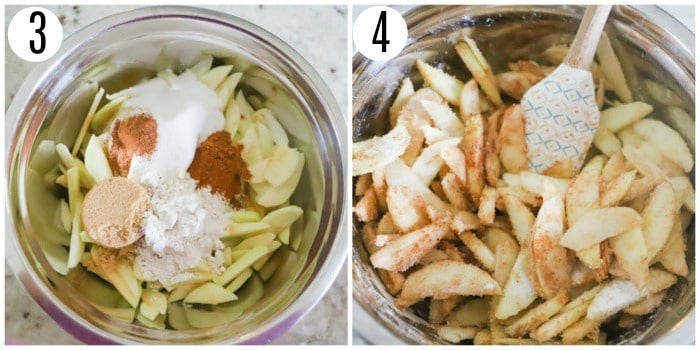
Once your apples are ready you can place them in a large mixing bowl.
Place the rest of the filling ingredients into the mixing bowl, and mix until apples are coated (see picture 3 and 4 below).
Allow your apples filling to sit for at least 5 minutes before adding them to the crust.
You can work on the topping while you wait for your apples to be ready.
Pro Tip: When adding sugar to your apples it will release water that is in the fruit. You don't want this water sitting in the bottom of your pie so allow your apples to sit and rest will give your apple time to draw that water out in the mixing bowl. The longer the sit the better. I would give it 1-2 hours to be safe.
Dutch Apple Pie Topping:
While you allow your apples to rest start working on your crumble topping.
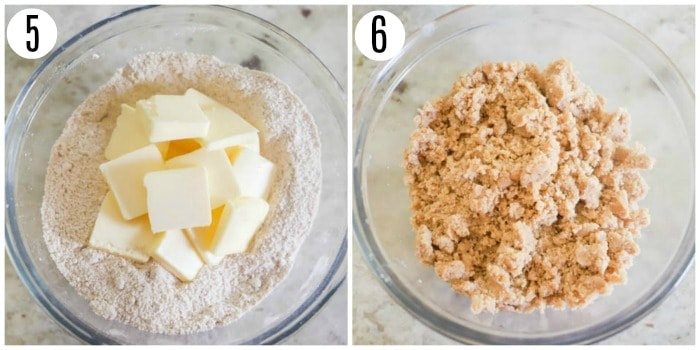
In a separate mixing bowl use a fork to combine all topping ingredients until the mixture is well combined and crumbly. You can use a fork but I also like to get in with my hands.
Pinching the butter into small pieces and having them coated in the dry ingredients.
Make sure you have a small crumble before adding it to the top of your pie.
When the topping is done it will look like sand. Below you can see in photo 5 what it looks like before and in photo 6 what it looks like after mixed well.
Pro Tip: The topping calls for cold cold butter that will melt when baking. Make sure your butter is very cold and firm right out of the fridge when you are ready to use it. You want to break up the butter into small pieces with the rest of the ingredients.
Dutch Apple Pie Crust:
Store bought or a homemade crust will work fine for this recipe. Whatever you feel comfortable with.
Most crust recipes and crust from the store will come with a top and bottom crust.
For this recipe, you will only need one crust since you will have the crumble topping.
If you want to make it homemade then try out my recipe homemade pie crust.
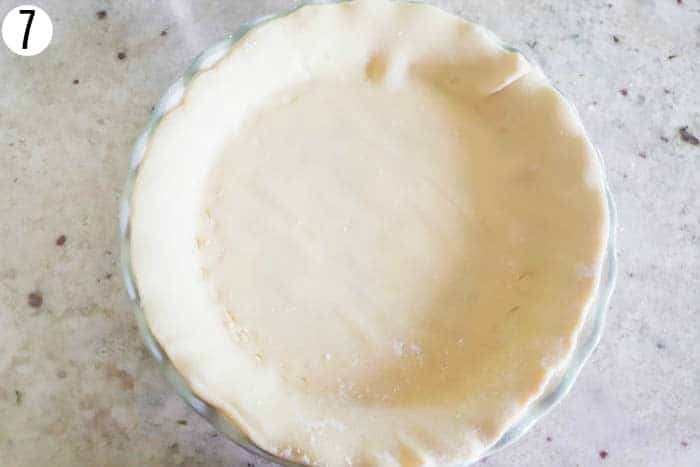
It's so simple to make and taste amazing! Once your pie crust is ready you can place it in an empty pie pan (see picture 7).
Pie Pan Size:
For this recipe, I used a standard 9-inch pie pan. I did place all 8 cups in the one pie pan.
The apples will cook down and all fit into the pan perfectly. You, of course, could add less for a less full pie.
Dutch Apple Pie Filling Tips:
Your apple pie filling should be ready to be placed into your pie crust.
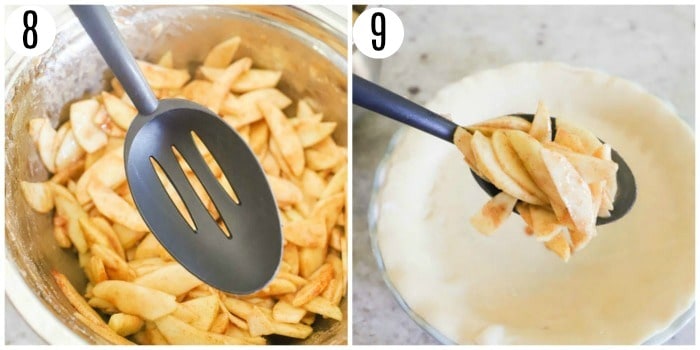
To make sure I don't get any of that juice I would suggest using a slotted spoon (see picture 8) to scoop out the apples and place them into your crust (see picture 9).
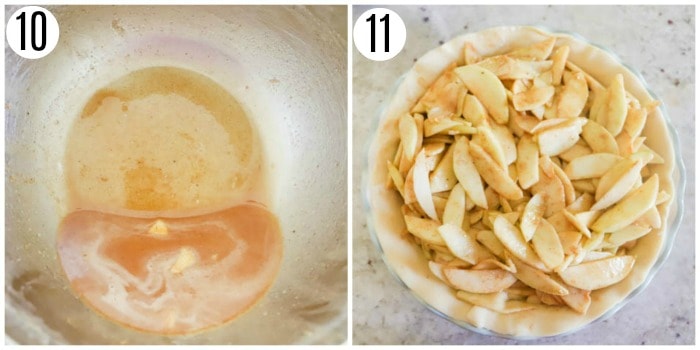
Slowly place all your apples into your pie crust. In the end, you should have a very full pie and juice leftover in your mixing bowl.
You can see in the picture below on the left (picture 10) all the juice that was leftover in my mixing bowl.
This could make your crust very soggy if you add it to your pie. When your apple pie is full (picture 11) then you are ready to top it.
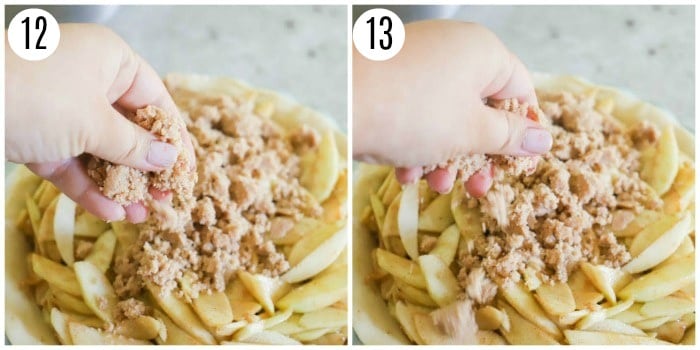
Next top your pie with your topping.
Using a crumbling motion (see picture 12 and 13) over the pie to make sure you break up the topping and leave any leftover dust in the bowl.
You want to make sure everything you add to the top of your pie is well coated in your butter to prevent burning.
Baking Dutch Apple Pie:
I like to play it safe and place a baking sheet under my pie.
This way if I have any leaking or dripping I can catch them and clean it easily. Place your pie in your preheated oven and bake for 50-55 minutes
Once your pie is done allow resting for at least 10-20 minutes before serving.
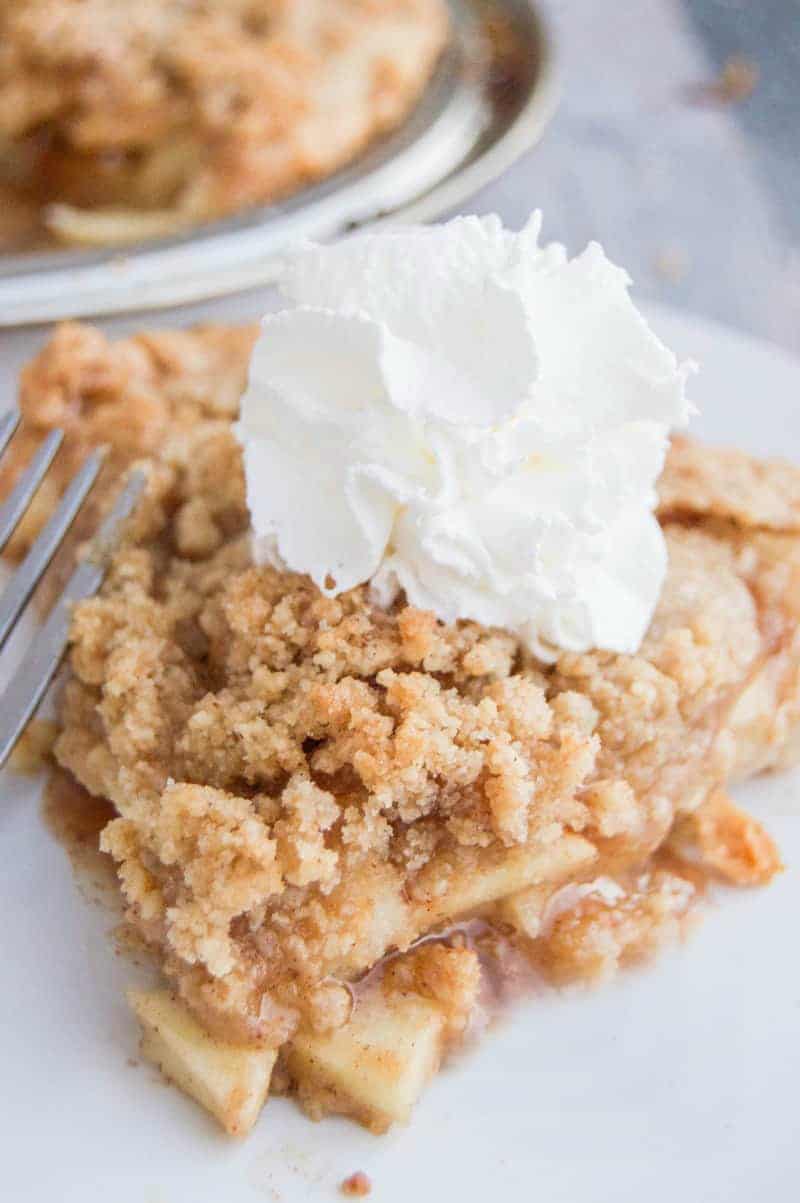
The longer it rests the firmer it will be and easier to serve. I serve mine with whipped cream or ice cream on top.
Dutch Apple Pie:
Here are a few of my favorite dutch apple pie inspired recipes.
- Dutch Apple Pie Bread: This bread is so simple to make and had a great apple pie flavor.
- Dutch Apple Pie Bars: These bars are perfect for serving at a party or holiday get together.
- Apple Pie Cookies: These cookies are my favorite! They are so easy to make and the perfect fall cookie recipe.
- Apple Pie Dip: If you want to skip the pie set up try this dip recipe instead.
If you tried this Dutch Apple Pie or any of my recipes I would love to hear from you, leave me a comment below. You can also connect with me on FACEBOOK, INSTAGRAM, and PINTEREST. I would love for you to follow along and discover more amazing recipes.
Dutch Apple Pie
Ingredients
Crust:
- Store bought or use my homemade recipe
Filling
- 8 cups Granny Smith apples. cored (peeled, cored, and sliced)
- 1 tablespoon Lemon juice
- ¾ cup White sugar
- ¼ cup Brown sugar
- ¼ cup Flour
- 1 teaspoon Cinnamon
- ¼ teaspoon Nutmeg
Topping
- 1 cup Flour
- ½ cup Brown sugar
- ½ cup White sugar
- 1 tablespoon Cinnamon
- ½ cup Butter (cold)
Instructions
- Preheat oven to 375 degrees F. Roll our crust and place it in the bottom of a pie pan and set aside.
- In a mixing bowl put all filling ingredients, and mix until apples are coated. Allow your apples filling to sit for at least 5 minutes before adding them to the crust.
- Meanwhile, in a separate mixing bowl use a fork to combine all topping ingredients until the mixture is well combined and crumbly. You can use a fork but I also like to get in with my hands. Pinching the butter into small pieces and having them coated in the dry ingredients.
- Spoon in apple filling then top with topping. Bake for 50-55 minutes. Serve warm with ice cream or whipped cream.
Video
Notes
- You want your apples sliced pretty thin. Once they came out of the apple slicer I sliced each slice into at least 4 other thinner slices.
- When adding sugar to your apples it will release water that is in the fruit. You don’t want this water sitting in the bottom of your pie so allow your apples to sit and rest will give your apples time to draw that water out in the mixing bowl.
- The topping calls for cold cold butter that will melt when baking. Make sure your butter is very cold and firm right out of the fridge when you are ready to use it. Make sure you have a small crumble before adding it to the top of your pie. When the topping is done it will look like sand.
- I used a standard 9-inch pie pan
- To make sure I don’t get any of that juice I would suggest using a slotted spoon to scoop out the apples and place them into your crust.
- I like to play it safe and place a baking sheet under my pie. This way if I have any leaking or dripping I can catch them and clean it easily.
Nutrition



I thought the recipe was great. No problems and it was delicious. The crumble dies make A LOT of topping, I didn't use it all. Everyone who had a slice raved about this pie. Thank you for the recipe I will use it again and would recommend
So glad you liked it!
Should you pre bake the crust before filling it?
No, you don't need to cook the apples before filling your pie.
No need to pre bake the crust. It will all cook together at the same time.
Made this recipe Fantastic, great recipe!! Quick and easy to whip up and so delicious!!!!! Just one thing, the crumb topping was too much. I couldn’t fit all of it on my pie. Cutting recipe in half is a nice pile on top with no leftovers. Beautiful pie too!! My new go to apple pie recipe
Thanks for sharing 💗
Maria
So happy to hear that!
About how many apples do I need to buy, to make for this recipe? For Medium size apples? Please, let me know because this is helpful information for me. Please reply soon. Thank you.
You will need 8-10 apples.
About how many apples do I need to make for this recipe? And are you using Medium size apples? How many apples do I need for the Medium size? Please reply soon, this is very helpful information for me. Thank you.
How many apples do I need for this recipe? Please, this is very helpful to me. I would like to try to Bake this soon, and I need to know how many apples are of these? And are these Medium size apples? And if not, then how many apples do I need, for Medium size apples? Please, Reply me, real soon. Thank you.
Hi I have a very sick 3 yrs. old can you use pie filling instead of real apples?
Yes!
I gotta say this recipe is so amazing and easy to follow! I made this tonight and was super nervous. Me and my husband loved it💜
Love this pie! Just made it for Thanksgiving and it put the store bought pumpkin pie to shame! Everyone loved it. I used the homemade crust recipe, too. Pie crust has always intimidated me, but this was buttery and delicious. The recipe was easy to follow and came out great. I'll definitely be making it again!
Yahh!! So happy to hear that!!
Do you think you could make this pie ahead of time and freeze it before baking it off? If so, do you recommend thawing it first or cooking from frozen?
I made this pie for thanksgiving yesterday and it was a HIT!!! I loved it and so did my family. I served it with Blue Bell vanilla ice cream (for those of you lucky enough to be in the South and enjoy Blue Bell 😉 ). I will probably eliminate the lemon juice next time. The recipe made enough to fill 2x9 inch pie crusts so luckily I got to keep one for myself.
So happy to hear that!!
I want to make this today for Thansgiving tomorrow. Can I re-heat before serving? What temp and time would you recommend?
Yes, you can do that. You would just need to reheat at the same temperature until warmed. You could also prepare your filling and crust and tomorrow just put it together and bake.
Hi, do you use Pam or grease the pie dish prior to putting the dough in pie dish?
I do not. I think it helps to keep my pie tender and flaky by skipping the greasing.
Trying this recipe this week for Thanksgiving! Do you think it would freeze well? If so, would you suggest to thaw it and bake or just bake frozen and adjust the cooking time?
This recipe is amazing. I’ve made it quite a few times since finding it. I don’t always use Granny Smith apples but whatever apples I use...the recipe never fails! I do let it cool so that the integrity is like a pie. The only thing I changed, besides the kind of apples, was that I used salted butter! I LOVE this recipe and so do my In-Laws!
So glad you liked it!! Thanks Cynthia!
Quick question. When you say set for two hours on the pro tip is that just apples with no sugar in it or with sugar in it? Sorry just making sure.
It is with the sugar. The sugar will bring out water from the apple and you don't want your pie to have a lot of the juice in the bottom.
Hi, I followed your instructions to let the mixed apples sit, then used a slotted spoon to scoop the apples and eliminate most of the water. However, my pie came our practically swimming in water and could not be sliced; it had to be scooped like a cobbler. It's also very sour. Is the lemon juice a necessity? Granny Smith apples are already sour.
I'm sorry that happened, Tim. You might need to let your apples sit in the sugar a little longer to get more water out of them. I updated the recipe tips to show that 1-2 hours if best and longer if needed to bring out the water. I even had a reader tell me they set the apples in a colander overnight. I usually find people tell me the pie is too sweet but if you find it to be sour you can skip the lemon juice. That is more to keep your apples from browning. I hope you try it again and appreciate your comment!
I’ve made this pie with great success several times, thank you for the recipe! My question is do you think this recipe would with with no crust as an apple crisp?
I think it would! I do have an apple crispy recipe if you want it, https://www.thediaryofarealhousewife.com/easy-apple-crisp/
Hi! Quick question -- do you use salted or unsalted butter?
Hi Sara, I used unsalted butter for this.
Hi Jennie! I wanted to ask if once the pie is done baking, if you should let it cool and set. Sadly, my pie pie filling was not solid or at least sort of solid like a regular apple pie. It kind of just fell apart when I cut into it. Thank you in advance!
Hi Sofia. I do a few things to help it from falling apart that I mentioned in the "baking dutch apple pie" section but I have a lot of info so I'm sorry if you missed that. When putting my apples in the pie crust I am very careful not to get the juice from the apples into the pie I usually use a slotted spoon to help with that. Then I do allow it to rest for 10-20 minutes before I serve. I'm sorry that happened to your pie! If you have any other questions let me know.
This is my husband's favorite dessert, and because of this recipe he won't order apple pie anywhere and instead begs me to make it instead. I was able to bribe him into doing a full on KonMari of his office/den space in exchange for me making this. I've also made this in muffin tins, which he takes to work.
You just made my day Natalie!! I LOVE that y'all love this recipe so much. Thank you for coming back and letting me know!
I made this and it came out a little runny. I’m not sure if I did something wrong, but it still tasted good. Do you know of a reason to why it would be runny? Thanks!
Hi Laure, I find it to be runny if I let the juice from the mixing bowl into the pie crust when adding the apples. Glad that it still tasted good!
Will it be okay if I use a mix of granny Smith apples and red apples? I don't think I have enough granny snith apples!
Yes! That will be fine. Red are a little sweeter so you may want to do less sugar or just to taste.
I absolutely love this apple pie recipe!!! The instructions are so clear and the notes are really helpful. Thank you so much!
Thank you!